How To Install A Cigarette Lighter In A Golf Cart

Installing a cigarette lighter in a golf cart can be a valuable addition, providing a convenient power source for charging devices, operating small appliances, or using other accessories while on the go. Whether you want to charge your phone, power a GPS device, or connect other electronic devices, a cigarette lighter offers a versatile solution. In this comprehensive guide, we will walk you through the step-by-step process of installing a cigarette lighter in a golf cart.
Having a cigarette lighter in your golf cart can enhance your overall experience, allowing you to stay connected and powered up during your golfing adventures. Whether you’re on the course or exploring off-road terrain, the ability to charge your devices or use accessories can greatly improve convenience and functionality.
This guide is designed to provide you with all the information you need to successfully install a cigarette lighter in your golf cart. We will cover everything from assessing the electrical system and gathering the necessary tools and materials to completing the installation with precision and safety.
By following our detailed instructions and tips, you’ll be able to add a cigarette lighter to your golf cart and enjoy the convenience of having a reliable power source at your fingertips. Let’s dive into the step-by-step process and get started on installing a cigarette lighter in a golf cart.
Assessing the Golf Cart’s Electrical System
Before diving into the installation process, it’s important to assess the golf cart’s electrical system. Understanding its components and power requirements will ensure a successful and safe installation.
Understanding the Electrical System Components
To begin, let’s familiarize ourselves with the key components of a golf cart’s electrical system. These components include the battery, wiring, and fuse box. Understanding how these components work together will help you plan and execute the installation more effectively.
Evaluating Power Requirements and Outlet Placement
Next, it’s essential to evaluate the power requirements for the cigarette lighter and determine the optimal placement within the golf cart. Consider the devices or appliances you plan to use with the lighter and their power consumption. Additionally, choose a suitable location for the lighter that provides easy access and convenient use.
Gathering Tools and Materials
To begin the installation, gather the necessary tools and materials. Having everything prepared beforehand will streamline the process and prevent any delays.
Essential Tools for the Installation
Here’s a list of tools you’ll need for a successful installation:
- Wire cutters
- Crimping tool
- Voltmeter
- Screwdrivers
- Drill and drill bits
- Wire strippers
- Heat shrink tubing and heat gun
- Electrical tape
- Zip ties
These tools will assist you in cutting and connecting wires, testing electrical connections, and securing components in place.
Required Materials and Wiring Components
In addition to tools, you’ll need the following materials and wiring components:
- Cigarette lighter socket
- Wire with appropriate gauge
- Crimp connectors
- Fuse holder and fuse
- Ring terminals
Choose high-quality materials and wiring components that are suitable for automotive applications. Using the correct gauge wire ensures efficient power delivery and prevents potential hazards.
Installing the Cigarette Lighter
Now let’s move on to the installation process itself. Follow these step-by-step instructions to install the cigarette lighter in your golf cart.
Step 1: Disconnecting the Golf Cart’s Battery
Before starting any electrical work, prioritize safety by disconnecting the golf cart’s battery. This step ensures that no power is flowing through the system, minimizing the risk of electrical shocks or short circuits.
Step 2: Running Wiring from the Battery Compartment
To connect the cigarette lighter, you’ll need to run wiring from the battery compartment to the desired location of the lighter. Carefully plan the wiring route, taking into account any potential obstacles or hazards. Properly securing the wiring along the way ensures a neat and organized installation.
Step 3: Connecting the Wiring and Fuse
With the wiring in place, it’s time to connect it to the appropriate components and ensure protection with a fuse. Follow these steps:
- Strip the insulation from the ends of the wiring using wire strippers, exposing the bare wire.
- Attach ring terminals to the stripped ends of the wiring using crimp connectors.
- Connect one end of the wiring to the positive terminal of the battery and the other end to the positive terminal of the cigarette lighter socket.
- Install a fuse holder near the battery connection and insert an appropriate fuse to protect the electrical system.
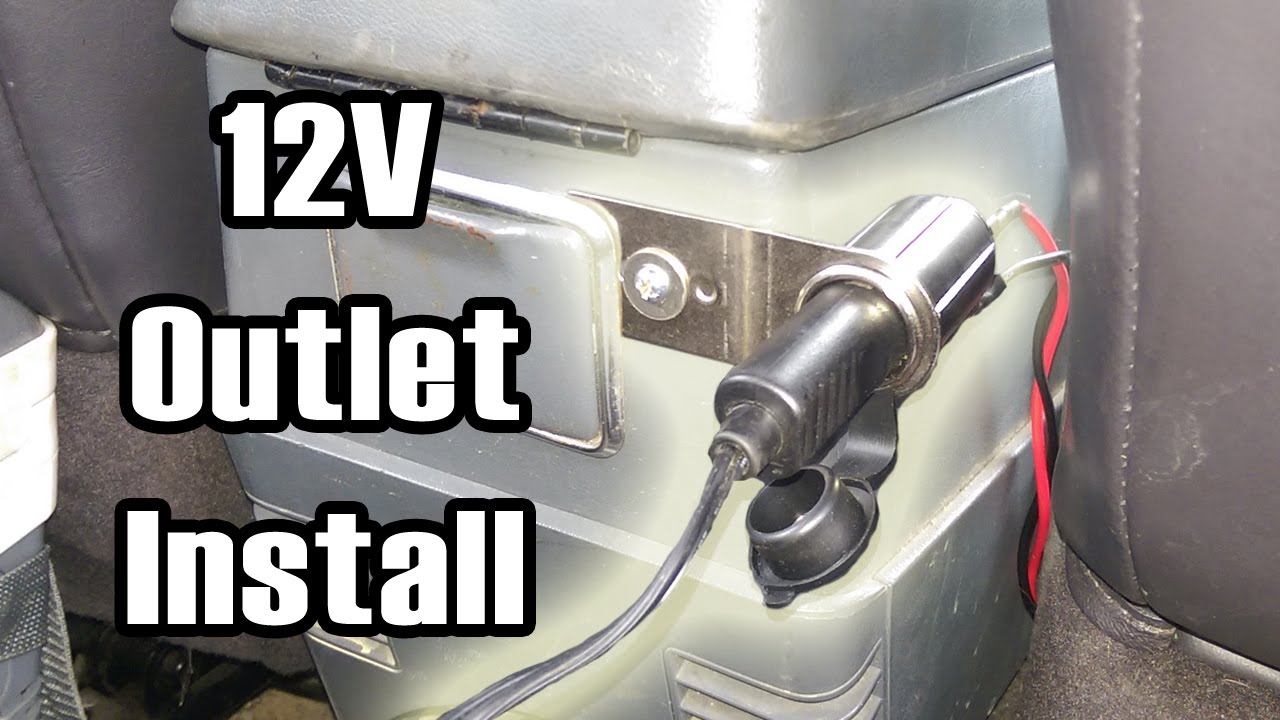
Step 4: Mountingand Securing the Cigarette Lighter
- Choose a suitable location within the golf cart for mounting the cigarette lighter. Consider accessibility and convenience.
- Use a drill and appropriate drill bits to create a hole in the chosen location. Ensure the hole is the correct size for the cigarette lighter socket.
- Insert the cigarette lighter socket into the hole and secure it in place using the provided mounting mechanism or brackets.
- Ensure the cigarette lighter socket is firmly attached and positioned correctly, allowing for easy insertion and removal of plugs.
Step 5: Testing the Installation
With the installation complete, it’s important to test the cigarette lighter to ensure proper functionality. Follow these steps to conduct a test:
- Reconnect the golf cart’s battery and ensure all connections are secure.
- Turn on the golf cart and insert a compatible device or accessory into the cigarette lighter socket.
- Verify that the device is receiving power and functioning as expected.
Additional Considerations and Tips
Safety Precautions
When working with electrical components, always prioritize safety. Disconnecting the golf cart’s battery before starting the installation is crucial. Also, ensure that all connections are secure and free from any exposed wiring to avoid electrical hazards.
Maintenance and Troubleshooting
To maintain the cigarette lighter’s performance, periodically inspect the wiring connections for any signs of wear or damage. Clean the lighter socket regularly to remove debris or buildup that may interfere with proper operation. If you encounter any issues, such as a non-functioning lighter or intermittent power, check the wiring connections and fuse for any loose or damaged components.
Professional Assistance
If you are unsure about any aspect of the installation or encounter difficulties, it’s always advisable to seek professional assistance. An experienced electrician or technician can provide guidance and ensure a safe and proper installation.
Conclusion: By following this step-by-step guide, you can successfully install a cigarette lighter in your golf cart. Adding this convenient power source opens up possibilities for charging devices, operating small appliances, or powering other accessories. Remember to assess your golf cart’s electrical system, gather the necessary tools and materials, and follow the installation instructions carefully. With a little effort and attention to detail, you’ll have a functional cigarette lighter in your golf cart, ready to meet your power needs on the go.