How To Paint A Golf Cart Roof
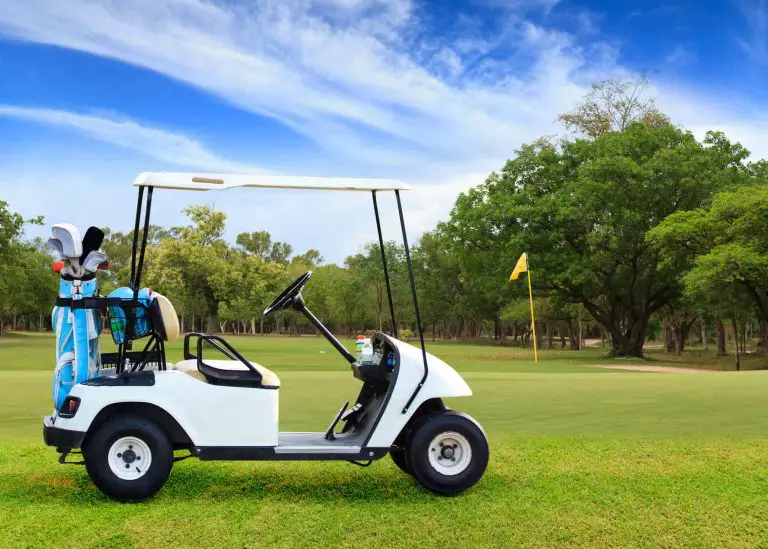
A golf cart serves as more than just a means of transport on the greens; it’s a reflection of your personal style and a statement of your love for the game. So why not give your golf cart a refreshing makeover by painting its roof? A newly painted roof not only enhances the visual appeal of your cart but also adds a layer of protection against the elements, ensuring its longevity.
In this comprehensive guide, we will take you through the step-by-step process of painting a golf cart roof, providing you with practical tips and insights along the way. From gathering the necessary materials and preparing the cart for painting to selecting the perfect paint and color, we’ll walk you through each stage with detailed instructions.
Whether you’re a seasoned DIY enthusiast or new to the world of golf cart customization, this guide will equip you with the knowledge and confidence to tackle this project with ease. We’ll discuss essential considerations such as priming techniques, choosing the right paint, and proper application methods to achieve a professional and long-lasting finish.
Join us as we embark on this journey to revitalize your golf cart and transform its roof into a striking canvas of personal expression. Let’s dive in and discover how to paint a golf cart roof like a pro.
Introduction to Painting a Golf Cart Roof
Before diving into the process, let’s understand the importance of painting a golf cart roof and the benefits it offers. A well-maintained roof not only adds to the visual appeal of your golf cart but also protects it from potential damage caused by sun exposure, rain, and other environmental factors. By following the proper painting techniques, you can significantly extend the life of your golf cart roof and maintain its vibrant appearance.
Gathering Materials and Preparing the Golf Cart
Before you embark on the painting process, it’s crucial to gather the necessary materials and prepare the golf cart adequately. Here’s what you need to consider:
Essential materials needed for painting the golf cart roof
| Materials | Description |
|---|---|
| Paint | High-quality automotive or marine-grade paint |
| Primer | Suitable primer for the golf cart roof surface |
| Paintbrushes/Rollers | Appropriate tools for applying paint and primer |
| Sandpaper | Various grits for sanding rough areas |
| Masking tape | To protect surrounding areas during painting |
| Cleaning supplies | Mild soap, water, and a sponge for cleaning the roof |
| Protective coverings | Tarps or plastic sheets to shield other parts of the cart |
| Ventilation equipment | Masks, goggles, and gloves for safety and comfort |
Choosing the right type of paint for the roof
When selecting paint for your golf cart roof, consider using high-quality automotive or marine-grade paint. These paints are designed to withstand outdoor conditions and provide long-lasting durability. Additionally, they offer excellent color retention and resistance to fading, ensuring your roof maintains its vibrancy over time.
Preparing the golf cart for painting
To achieve a smooth and professional paint finish, you must adequately prepare the golf cart roof. Follow these steps:
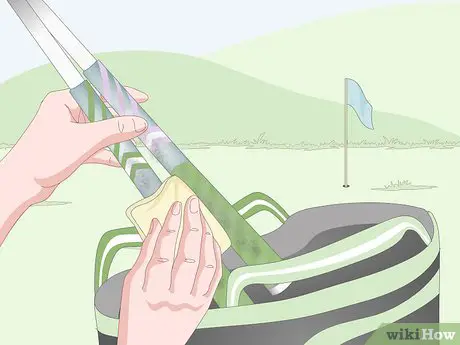
- Cleaning the roof surface: Thoroughly clean the roof using a mild soap, water, and a sponge. Remove any dirt, debris, or old paint that may interfere with the adhesion of the new paint.
- Sanding any rough areas: Inspect the roof surface for any rough or uneven areas. Use sandpaper with varying grits to smoothen these imperfections, ensuring a seamless paint application.
- Masking off the surrounding areas: To protect the rest of the golf cart from overspray, use masking tape to cover the edges and any other areas you want to keep paint-free. This step ensures a neat and clean paint job.
By taking the time to gather the necessary materials and adequately prepare the golf cart, you lay the foundation for a successful painting process.
Priming the Golf Cart Roof
The primer serves as a crucial layer between the roof surface and the paint, promoting better adhesion and ensuring a more even finish. Here’s what you need to know about priming the golf cart roof:
Importance of using primer on the roof
Priming is an essential step when painting any surface, including a golf cart roof. The primer creates a smooth and consistent base, allowing the paint to adhere better and preventing issues such as peeling or chipping in the future. It also helps to seal any porous areas, providing added protection to the roof surface.
Choosing the appropriate primer for the golf cart roof
Selecting the right primer is crucial for achieving optimal results. Consider the following factors when choosing a primer for your golf cart roof:
- Compatibility: Ensure that the primer is compatible with the type of paint you’ll be using. Check the manufacturer’s recommendations or consult with a paint specialist to find a suitable match.
- Adhesion: Look for a primer specifically designed for use on metal or fiberglass surfaces, as these are commonly used in golf cart construction. The primer should have excellent adhesion properties to create a strong bond between the roof and the paint.
- Weather resistance: Since golf carts are often exposed to various weather conditions, including sunlight and moisture, opt for a primer that offers good weather resistance. This helps protect the roof from potential damage caused by UV rays, rain, and humidity.
Applying primer to the roof surface
Once you’ve selected the appropriate primer, it’s time to apply it to the golf cart roof. Follow these steps for a smooth and effective application:
- Using a brush or roller for application: Depending on the size and shape of your golf cart roof, you can use a brush or a roller to apply the primer. A brush is ideal for smaller or intricate areas, while a roller allows for faster application on larger surfaces.
- Ensuring even coverage of the roof: Apply the primer in thin, even coats, moving in one direction. Start from one end of the roof and work your way to the other, ensuring complete coverage. Avoid applying too much primer, as it can lead to drips or an uneven finish.
- Allowing proper drying time: Follow the manufacturer’s instructions regarding the drying time of the primer. It’s essential to allow sufficient drying time before proceeding to the next steps. This ensures that the primer fully cures and provides a solid foundation for the paint.
By properly priming the golf cart roof, you enhance the adhesion of the paint and create a durable and long-lasting finish.
Choosing the Paint and Color
When it comes to painting the golf cart roof, you have various options in terms of paint types and colors. Consider the following factors when choosing the right paint and color for your golf cart roof:
Exploring different paint options for the golf cart roof
There are several types of paints suitable for painting a golf cart roof. Here are a few options to consider:
- Automotive paint: Automotive paints are known for their durability and resistance to environmental factors. They provide a glossy finish and are available in a wide range of colors. Additionally, automotive paints offer excellent color retention, ensuring your roof maintains its vibrancy for years to come.
- Marine-grade paint: Marine-grade paints are designed to withstand harsh marine environments, making them an excellent choice for golf cart roofs exposed to moisture and humidity. These paints provide superior protection against corrosion and fading.
- Spray paint: Spray paints offer convenience and ease of application, especially for intricate designs or hard-to-reach areas. They come in various finishes, such as matte, satin, or glossy, allowing you to achieve the desired look for your golf cart roof.
Considering the climate and usage conditions
When selecting a paint for your golf cart roof, consider the climate and usage conditions it will be exposed to. If you frequently use your golf cart in a sunny and hot climate, choose a paint that offers UV protection to prevent color fading and damage from sun exposure. Similarly, if you often drive your golf cart in rainy or humid areas, opt for a paint that is resistant to moisture and corrosion.
Selecting the desired color for the roof
The color of your golf cart roof can significantly impact its overall appearance. When choosing a color, consider the following factors for guidance:
- Factors to consider when choosing a color:
- Personal preference: Select a color that reflects your personal style and complements the overall aesthetics of your golf cart. Whether you prefer bold and vibrant colors or more subtle tones, choose a color that resonates with you.
- Visibility: Keep in mind that the roof color can affect the visibility of your golf cart. Opt for colors that are easily visible, especially if you frequently drive in areas with heavy traffic or low lighting conditions.
- Maintenance: Consider the ease of maintenance when selecting a color. Lighter shades tend to show dirt and stains more easily, requiring more frequent cleaning, while darker colors may conceal dirt but may be prone to fading over time.
- Popular color choices for golf cart roofs:
- Classic white: White is a timeless and popular choice for golf cart roofs. It offers a clean and sleek look, and it can complement any color scheme or design.
- Bold and vibrant colors: If you want to make a statement, consider bold and vibrant colors such as red, blue, green, or yellow. These colors can add personality and create a visually striking appearance.
- Custom designs and graphics: Some golf cart owners prefer to go beyond a single color and opt for custom designs or graphics on their roofs. This allows for personalization and creativity, showcasing unique patterns, logos, or decals.
Remember that the color you choose should not only be visually appealing but also align with your personal preferences and the overall style of your golf cart.
Applying the Paint
Now that you’ve gathered the materials, prepared the golf cart, and selected the paint and color, it’s time to apply the paint to the roof. Follow these steps for a successful paint application:
Best practices for painting the golf cart roof
Before you begin painting, keep these best practices in mind to ensure a smooth and professional finish:
- Temperature and weather conditions: Ideally, paint your golf cart roof in a well-ventilated area with moderate temperatures. Avoid painting on extremely hot or humid days, as it can affect the paint’s drying time and overall quality.
- Layering technique: Apply the paint in thin, even coats. Multiple thin coats provide better coverage and adhesion compared to one thick coat. It also helps prevent drips and allows for better control over the paint application.
- Painting order: Start painting from the top and work your way down. This ensures that any accidental drips or spills from the upper areas won’t affect the already painted sections.
Using the appropriate tools for painting
To achieve a professional-looking finish, it’s essential to use the right tools for the painting process. Consider the following options:
- Paintbrushes: High-quality paintbrushes with synthetic bristles are ideal for smaller or intricate areas. Choose brushes with various sizes to accommodate different parts of the roof.
- Rollers: Foam or microfiber rollers are excellent for larger and more expansive roof areas. They allow for quick and efficient paint application and provide a smooth finish.
- Spray guns: For those experienced in spray painting, using a spray gun can provide an even and flawless finish. However, spray guns require proper technique and control to avoid overspray or uneven application.
Select the tool that best suits your painting skills, the size of the roof, and the desired finish.
Applying the paint in smooth, even strokes
Now, let’s walk through the steps for applying the paint to your golf cart roof:
- Starting from one end and working towards the other: Begin painting from one end of the roof and work your way to the other. This ensures consistent coverage and minimizes the chances of accidentally smudging or touching the freshly painted surface.
- Avoiding excessive paint buildup: Apply the paint in smooth, even strokes, overlapping each stroke slightly for seamless blending. Avoid applying too much paint in one area, as it can lead to runs, drips, or an uneven finish. It’s better to apply multiple thin coats, allowing each coat to dry before applying the next.
- Pattern break: Practical Tip – Using a paint grid: To maintain a consistent paint application, consider using a paint grid. A paint grid is a rectangular-shaped tool with evenly spaced ridges that allows you to remove excess paint from your brush or roller. It ensures a more controlled and even distribution of paint, resulting in a smoother finish.
- Pattern break: Pro Tip – Feathering technique for edges: When painting near the edges or corners of the roof, use a feathering technique. Start by applying less pressure on the brush or roller and gradually increase pressure as you move away from the edge. This technique helps blend the paint and create a seamless transition.
Remember to follow the manufacturer’s instructions regarding drying times between coats. Proper paint application techniques contribute to a professional-looking finish for your golf cart roof.
Drying and Curing the Paint
After applying the paint, it’s crucial to allow sufficient drying and curing time to ensure the longevity and durability of the finish. Follow these guidelines:
Allowing the paint to dry properly
Drying time can vary depending on the type of paint and environmental conditions. Follow the paint manufacturer’s recommendations for drying time. It’s important not to rush the process to avoid smudges, smears, or damage to the paint.
Creating a suitable environment for drying
To facilitate proper paint drying, it’s essential to create a suitable environment. Consider the following tips:
- Avoiding direct sunlight or extreme temperatures: Choose a well-ventilated area away from direct sunlight. Extreme heat or cold can affect the drying process and result in an uneven finish or paint damage.
- Providing proper ventilation: Ensure adequate airflow to help speed up the drying process. Open windows or use fans to promote air circulation, but avoid direct airflow that may cause dust or debris to settle on the freshly painted surface.
- Pattern break: Practical Tip – Using drying racks: To prevent any accidental contact with the drying paint, consider using drying racks. These racks are designed to suspend the golf cart roof, allowing it to dry without touching any surfaces.
By providing the ideal drying conditions, you promote proper paint curing and enhance the overall durability of your golf cart roof.
Curing the paint for long-lasting durability
While the paint may be dry to the touch, it’s crucial to allow sufficient curing time before exposing the roof to any external elements or potential damage. Curing time refers to the duration it takes for the paint to reach its maximum hardness and durability.
Follow the paint manufacturer’s instructions for curing time. It typically ranges from a few days to a couple of weeks. Avoid placing any objects on the roof or subjecting it to excessive force or cleaning during the curing period.
By allowing the paint to properly dry and cure, you ensure a long-lasting and resilient finish for your golf cart roof.
Finishing Touches and Reassembly
Once the paint has dried and cured, it’s time to add the finishing touches and reassemble any components or accessories. Follow these steps to complete the painting process:
Removing masking tape and protective coverings
Carefully remove the masking tape and any protective coverings from the surrounding areas of the golf cart. Take your time to peel off the tape slowly, ensuring that it doesn’t damage the newly painted surface.
Inspecting the paint job for any imperfections
Thoroughly inspect the paint job for any imperfections, such as drips, uneven areas of coverage, or paint chips. If you notice any flaws, make note of them for touch-up purposes.
Touching up any areas that require attention
To address any imperfections or areas that need touch-up, follow these steps:
- Sand and smooth: If you encounter any rough or uneven areas, lightly sand them with fine-grit sandpaper to create a smooth surface.
- Pattern break: Pro Tip – Feathering technique for touch-ups: When touching up small areas, use a feathering technique similar to what was mentioned earlier. Gradually blend the touch-up paint with the surrounding area to create a seamless finish.
- Apply touch-up paint: Use a small brush or paint applicator to carefully apply touch-up paint to the areas that require attention. Ensure that the touch-up paint matches the color and type of paint used on the rest of the roof.
Ensuring a seamless and professional finish
After addressing any imperfections and completing touch-ups, step back and evaluate the overall finish of your golf cart roof. Make sure that the paint is smooth, even, and visually appealing. A seamless and professional finish enhances the aesthetics of your golf cart and adds a touch of sophistication.
Maintenance and Care Tips
To prolong the life and appearance of your freshly painted golf cart roof, proper maintenance and care are essential. Follow these guidelines:
Guidelines for maintaining the painted golf cart roof
- Regular cleaning: Clean the painted surface regularly using a mild soap and water solution. This helps remove dirt, grime, and environmental debris that can accumulate over time.
- Avoid harsh chemicals: Use non-abrasive cleaning products and avoid harsh chemicals that can potentially damage the paint. Opt for cleaners specifically designed for automotive or marine applications.
- Preventative measures: Take proactive steps to protect the paint finish. For example, avoid parking the golf cart under trees that may drop sap or branches, as they can mar the paint surface.
Cleaning and protecting the paint finish
To keep your golf cart roof looking its best, consider the following cleaning and protection tips:
- Using appropriate cleaning products: Use a soft sponge or microfiber cloth when cleaning the painted surface. Avoid abrasive materials or harsh scrubbing that can scratch or dull the paint.
- Applying wax or sealant for added protection: Consider applying a layer of automotive wax or sealant to the painted surface. This provides an additional protective barrier against UV rays, moisture, and other environmental factors. Follow the manufacturer’s instructions for application and frequency of reapplication.
Regular inspections and touch-ups
Regularly inspect your golf cart roof for any signs of wear, scratches, or chips. Promptly address any issues to prevent further damage. Touch-up paint can be used to fix small areas, while larger areas may require professional assistance for repainting.
By implementing proper maintenance and care practices, you can extend the lifespan and preserve the pristine appearance of your golf cart roof.
Personalization and Additional Customization
Painting your golf cart roof opens up opportunities for personalization and additional customization. Consider the following options to add your unique touch:
Adding decals or graphics to the golf cart roof
Decals or graphics are a popular way to personalize your golf cart roof. They allow you to showcase your favorite sports team, a unique design, or any other artwork that reflects your interests and style. Ensure that the decals or graphics are applied to a clean and dry surface for optimal adhesion.
Exploring other customization options
Beyond paint and decals, there are numerous customization options available for your golf cart roof. Consider the following possibilities:
- Installing a roof rack or cargo carrier: If you often need extra storage space, adding a roof rack or cargo carrier can be a practical and convenient solution. This allows you to transport items such as golf clubs, coolers, or camping gear securely on the roof of your golf cart.
- Incorporating lighting features: Enhance the functionality and visual appeal of your golf cart roof by installing lighting features. LED lights or light bars can illuminate the roof area, providing increased visibility during nighttime rides and adding a stylish touch.
Remember to research and follow the manufacturer’s instructions when customizing your golf cart roof. Ensure that any modifications comply with local regulations and do not compromise the safety or structural integrity of the vehicle.
Conclusion
Painting a golf cart roof not only improves its appearance but also provides protection against the elements. By following the step-by-step process outlined in this guide, you can achieve a professional-looking finish and extend the lifespan of your golf cart roof. Remember to gather the necessary materials, properly prepare the surface, choose the right paint and color, apply the paint using the recommended techniques, and allow sufficient drying and curing time. Additionally, maintaining and caring for the painted surface will ensure its longevity and keep your golf cart looking fresh and vibrant for years to come. So go ahead, give your golf cart roof a makeover, and enjoy cruising in style!