How To Remove Golf Grip Tape
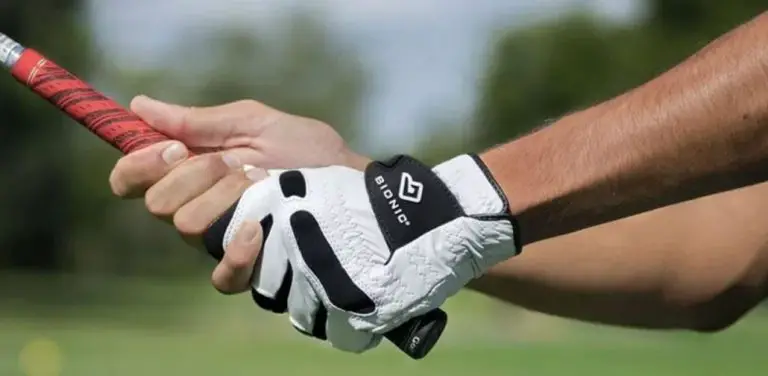
Having a secure and comfortable grip on your golf club is essential for a successful swing and consistent performance on the course. Over time, golf grip tape can wear out, lose its tackiness, or become damaged, necessitating its removal and replacement. Knowing how to remove golf grip tape properly is a valuable skill that every golfer should possess.
In this comprehensive guide, we will walk you through the step-by-step process of removing golf grip tape, ensuring a clean and efficient removal without causing any damage to your club. From the necessary tools and materials to the techniques for removing stubborn residue, we’ve got you covered.
But why is it necessary to remove grip tape in the first place? As you continue to use your golf clubs, the grip tape may deteriorate, affecting its effectiveness and compromising your grip. Signs such as visible wear and tear, reduced traction, and loss of tackiness indicate that it’s time for grip tape replacement.
By following our instructions and tips, you’ll be able to remove the old grip tape, clean the club shaft, and prepare it for re-gripping with fresh tape. Get ready to improve your grip and elevate your game with this comprehensive guide on how to remove golf grip tape. Let’s dive in!
Why is it necessary to remove golf grip tape?
Before delving into the process of removing golf grip tape, let’s first understand why it is necessary in the first place. Golf grip tape serves as the primary interface between your hands and the club, providing traction and stability during your swing. Over time, grip tape can become worn, slick, or lose its tackiness, which can negatively impact your grip and ultimately affect your performance on the course.
There are a few signs that indicate grip tape removal is necessary. If you notice any of the following, it’s a clear indication that it’s time to replace your grip tape:
- Visible wear and tear: Look for signs of cracking, peeling, or fraying on the grip tape surface.
- Reduced grip traction: If your hands slip during your swing or you feel like you’re losing control over the club, it’s a sign that your grip tape needs replacement.
- Loss of tackiness: Grip tape should have a certain level of stickiness to ensure a secure grip. If it feels smooth or lacks adhesion, it’s time to remove and replace it.
Tools and materials required for removing golf grip tape
Before you start removing golf grip tape, gather the necessary tools and materials to ensure a smooth and efficient process. Here’s a list of essential items you’ll need:
| Tools | Materials |
|---|---|
| Utility knife | Adhesive remover |
| Grip tape remover | Clean cloth or sponge |
| Heat gun or hairdryer | |
While the utility knife and grip tape remover are the primary tools, a heat gun or hairdryer can be beneficial to soften the adhesive for easier removal. Additionally, having an adhesive remover on hand will help in eliminating any residue left behind after removing the grip tape.
Preparing the golf club for grip tape removal
Before diving into the grip tape removal process, it’s essential to prepare the golf club adequately. Follow these steps to ensure a smooth removal process:
- Removing the clubhead cover (if applicable): If your club has a head cover, remove it to provide easier access to the grip tape area.
- Placing the club in a secure position for stability: Find a secure surface or use a vise with soft jaws to hold the club steady during the removal process. This will provide stability and prevent the club from slipping while you work on removing the grip tape.
- Ensuring the club is clean and dry: Wipe down the club shaft with a clean cloth or sponge to remove any dirt, debris, or moisture that may interfere with the grip tape removal process. It’s essential to start with a clean surface for optimal results.
With the golf club prepared, you’re now ready to begin the process of removing the grip tape.
How to remove golf grip tape
Removing golf grip tape involves a few simple steps, but it requires careful attention to ensure a clean removal without damaging the club shaft. Follow these instructions to remove the grip tape effectively:
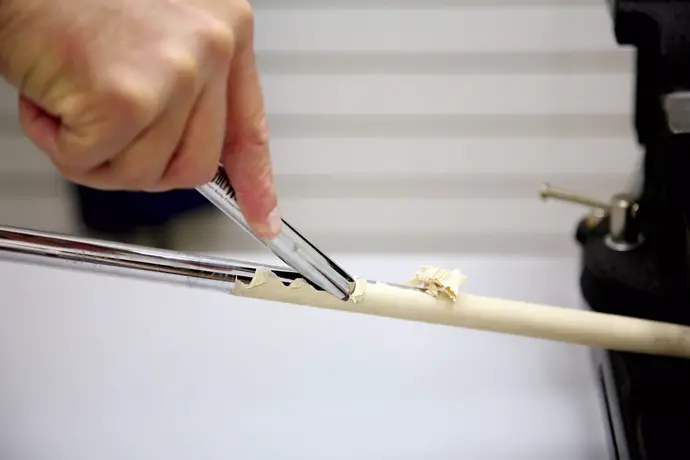
Step 1: Cutting the grip tape
The first step in the removal process is to cut the grip tape. This will help loosen the adhesive and make it easier to peel off. Follow these sub-steps to cut the grip tape effectively:
1. Identifying the starting point: Locate the end of the grip tape where it begins to overlap. This is typically found at the top of the grip near the clubhead.
- Using a utility knife or grip tape remover tool: Take a sharp utility knife or a specialized grip tape remover tool and carefully insert it under the edge of the grip tape at the starting point. Gently cut through the tape, ensuring not to press too hard to avoid damaging the club shaft underneath.
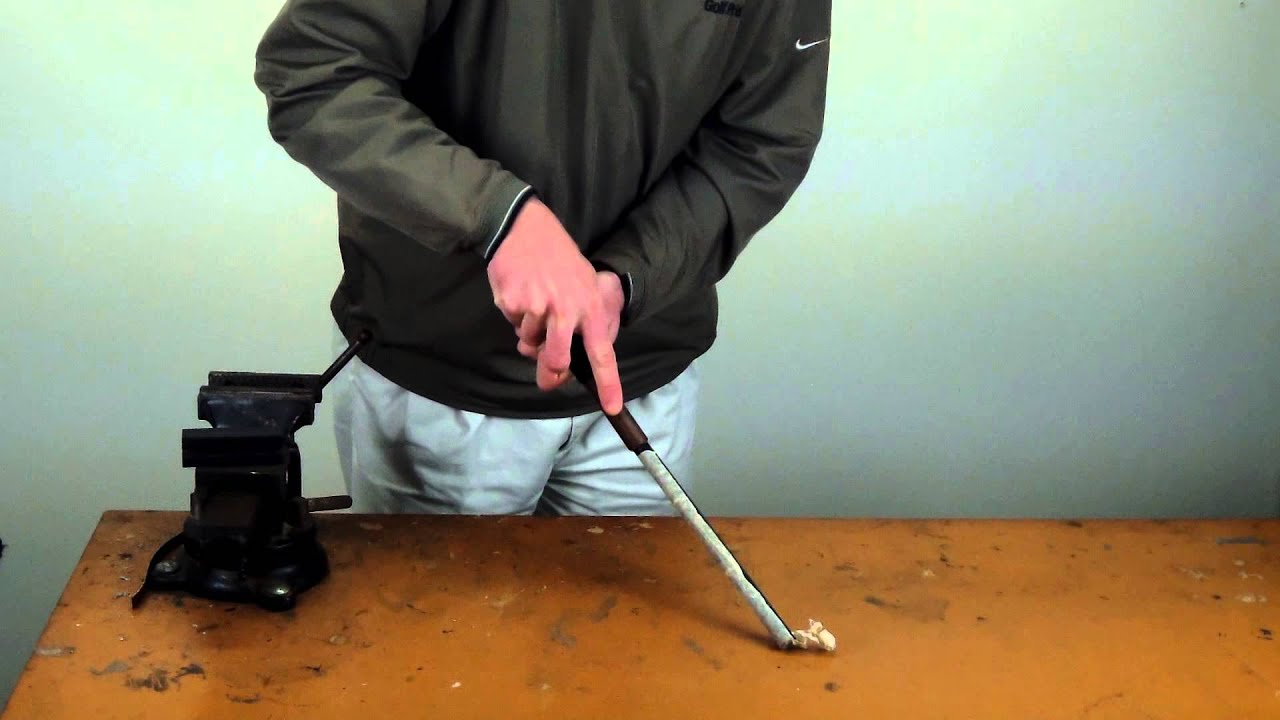
Step 2: Peeling off the grip tape
Once you’ve made the initial cut, it’s time to peel off the grip tape from the club shaft. This step requires patience and attention to detail to ensure a clean removal. Follow these sub-steps to peel off the grip tape effectively:
- Applying heat to loosen the adhesive: Using a heat gun or hairdryer on a low heat setting, apply heat to the grip tape as you slowly peel it off. The heat will help soften the adhesive, making it easier to remove without leaving residue behind.
- Slowly peeling the tape from the club shaft: Start peeling the grip tape from the cut end, gradually working your way down the shaft. Pull the tape off in a smooth and controlled manner, ensuring it doesn’t tear or leave any adhesive residue on the club shaft.
Step 3: Removing any residue
After removing the grip tape, it’s common to encounter adhesive residue left behind on the club shaft. It’s important to remove this residue to provide a clean surface for re-gripping. Follow these sub-steps to remove any grip tape residue effectively:
- Using adhesive remover or solvent: Apply a small amount of adhesive remover or solvent onto a clean cloth or sponge. Gently rub the residue with the cloth, allowing the solution to dissolve the adhesive. Be cautious not to use excessive force or soak the cloth, as it may damage the club shaft’s finish.
- Wiping away the residue with a cloth or sponge: Once the adhesive has been loosened, use the cloth or sponge to wipe away the residue. Continue this process until the club shaft is clean and free of any sticky remnants.
Dealing with stubborn grip tape residue
In some cases, stubborn grip tape residue may require additional techniques to remove effectively. Here are a few strategies you can try:
Techniques for removing adhesive residue
- Scrubbing with a brush or abrasive pad: If the adhesive residue proves challenging to remove, you can use a soft-bristled brush or an abrasive pad specifically designed for golf club cleaning. Gently scrub the residue in circular motions, applying light pressure to avoid damaging the club shaft.
- Soaking the residue in solvent for easier removal: If the adhesive residue persists, soak a cloth or sponge in an adhesive remover or solvent and place it directly over the residue. Allow the solvent to penetrate the adhesive for a few minutes before attempting to wipe it away. This method can help loosen stubborn residue for easier removal.
It’s important to exercise caution when using these techniques, especially on delicate club shaft materials. Always test the solvent or abrasive pad on a small, inconspicuous area of the club shaft before applying it to the entire residue-affected area.
Cleaning the club shaft after grip tape removal
Once you have successfully removed the grip tape and any residue, it’s crucial to clean the club shaft thoroughly. Follow these steps to ensure a clean and ready-to-use club shaft:
- Using a mild cleaning solution to remove dirt or grime: Prepare a mild soapy solution by mixing a small amount of dish soap with warm water. Dampen a clean cloth or sponge with the solution and gently wipe down the club shaft. Pay close attention to any areas that may still have residue or dirt. Be careful not to saturate the club shaft with excessive moisture.
- Drying the club shaft thoroughly: After cleaning, use a dry cloth to remove any excess moisture from the club shaft. Ensure that it is completely dry before proceeding to the next steps.
Inspecting the club shaft for damage
With the grip tape removed and the club shaft cleaned, take a moment to inspect the shaft for any signs of damage. Look for dents, scratches, or wear that may require repair or further attention. Addressing any necessary repairs at this stage will ensure that your club is in optimal condition for re-gripping and future use.
If you notice any significant damage, it is advisable to consult a professional club repair technician for guidance on the best course of action.
Applying new golf grip tape
Now that the club shaft is clean and in good condition, you can proceed with applying new golf grip tape. Proper application of grip tape is crucial for achieving a secure and comfortable grip. Follow these steps to ensure a successful application:
Preparing the club shaft for re-gripping
- Sanding the shaft (if needed): If the club shaft has a textured or rough surface, it’s recommended to lightly sand it using fine-grit sandpaper. This will create a smooth surface for the grip tape to adhere to. Be gentle and avoid applying excessive pressure, as you don’t want to remove too much material or alter the shaft’s characteristics.
- Applying grip tape adhesive primer (optional): Some golfers prefer to apply a grip tape adhesive primer to enhance the bond between the grip tape and the club shaft. If you choose to use a primer, follow the manufacturer’s instructions for application and drying times.
Applying new grip tape
- Measuring and cutting the tape to size: Start by measuring the length of the club shaft where the grip will be positioned. Use a utility knife to cut the grip tape to the appropriate length. It should be slightly shorter than the grip length to avoid interference with the butt end of the grip.
- Wrapping the tape smoothly and evenly: Begin wrapping the grip tape around the club shaft, starting from the bottom and working your way up towards the desired grip position. Maintain a consistent tension as you wrap, ensuring the tape is applied smoothly and without any creases or overlaps. Continue wrapping until you reach the desired grip position.
Re-gripping the golf club
With the grip tape applied, it’s time to install the new grip onto the club shaft. Follow these steps for successful re-gripping:
- Selecting the new grip: Choose a golf grip that suits your preferences in terms of material, size, and texture. Consider factors such as weather conditions, playing style, and personal comfort.
- Aligning the grip properly: Position the grip over the grip tape, aligning any alignment marks or logos according to your preference. Ensure the grip is straight and centered.
- Activating the grip adhesive: Most golf grips come with a double-sided grip tape or adhesive strip. Remove the protective backing from the adhesive and apply a grip solvent or tape-activated solvent to activate the adhesive.
- Installing the grip securely on the club shaft: With the adhesive activated, carefully slide the grip onto the club shaft, starting from the top and working your way down. Apply steady and even pressure as you push the grip into place, ensuring it is fully seated against the grip tape.
Final touches and considerations
As you complete the re-gripping process, there are a few final touches and considerations to keep in mind:
- Removing any excess adhesive: Check for any excess adhesive that may have squeezed out from underneath the grip. Use a clean cloth or paper towel to wipe away any excess adhesive, ensuring a clean and neat appearance.
- Allowing time for the grip to set: Give the grip ample time to set and adhere to the club shaft. Follow the manufacturer’s instructions for recommended drying or curing time. Avoid using the club until the grip has fully set to ensure a secure bond.
- Checking the grip for proper alignment and feel: Once the grip has fully set, inspect it to ensure proper alignment and feel. Make any necessary adjustments to align the grip according to your preference. Ensure that the grip feels comfortable and provides the desired traction.
- Encouraging practice and enjoyment with the improved grip: With your golf club’s grip replaced and in optimal condition, take advantage of the improved grip and enjoy your time on the course. Regularly inspect your grips for signs of wear and consider replacing them as needed to maintain optimal performance.
Conclusion
Removing golf grip tape is a simple yet essential skill for any golfer. By following the step-by-step process outlined in this article, you can remove old and worn grip tape, clean the club shaft, and apply new grip tape to achieve a secure and comfortable grip. Remember to exercise caution and patience throughout the process to prevent damage to the club shaft. With a properly maintained grip, you’ll have the confidence and control needed to enhance your golfing experience. Enjoy your improved grip and happy golfing!