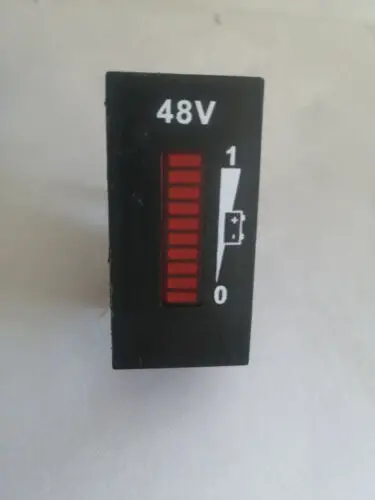
How to Reset Golf Cart Battery Meter

The battery meter in your golf cart is a crucial component for monitoring the battery’s charge level and ensuring optimal performance on the course. However, over time, the battery meter may become inaccurate or display erratic readings, leading to confusion and potential issues during your rounds. That’s where knowing how to reset the golf cart battery meter comes in handy.
In this comprehensive guide, we will take you through the step-by-step process of resetting the golf cart battery meter. Whether you’re facing flashing lights, stuck readings, or simply want to recalibrate the meter for accurate battery monitoring, we’ve got you covered. By resetting the battery meter, you can regain confidence in knowing the exact charge status of your golf cart’s battery, allowing you to plan your rounds more effectively and prevent unexpected power loss on the course.
Throughout this guide, we will explore various methods for resetting the battery meter, including manual resets for analog and digital meters, as well as alternative methods such as battery discharge. We will also provide important safety measures and additional tips for maintaining optimal battery meter accuracy.
So, if you’re ready to regain control over your golf cart’s battery monitoring and ensure accurate readings, let’s dive into the step-by-step process of resetting the golf cart battery meter. Get ready to elevate your golfing experience with a fully calibrated battery meter that keeps you in the know!

Why Reset the Golf Cart Battery Meter: Understanding the Need
The golf cart battery meter is a vital component that provides valuable information about the battery’s state of charge. However, there are several reasons why you may need to reset the battery meter:
- Inaccurate Readings: Over time, the battery meter may lose calibration, leading to incorrect readings that can misrepresent the battery’s actual charge level.
- Battery Replacement: When you replace the batteries in your golf cart, resetting the battery meter ensures that it accurately reflects the new battery’s charge status.
- Troubleshooting: Resetting the battery meter is often a recommended troubleshooting step when experiencing issues such as flashing lights, stuck readings, or erratic behavior.
By resetting the golf cart battery meter, you can regain accurate battery status information, allowing you to make informed decisions and ensure optimal performance on the golf course.
Assessing Your Golf Cart Battery Meter: Current State and Issues
Before diving into the reset process, it’s important to assess the current state of your golf cart battery meter and identify any existing issues. Common issues with the battery meter include:
- Flashing Lights: The battery meter may exhibit flashing lights, indicating a potential problem with the battery or meter itself.
- Stuck Reading: The meter needle or digital display may become stuck at a particular reading and not respond to changes in battery charge.
- Erratic Behavior: The meter may display inconsistent or unpredictable readings, making it difficult to determine the accurate battery status.
By evaluating the current state of your battery meter, you can better understand the potential issues and determine if a reset is necessary.
Preparing for Battery Meter Reset: Safety Measures and Precautions
Before proceeding with the battery meter reset, it’s important to take proper safety measures and precautions. Follow these steps to prepare for the reset:
- Park on a Level Surface: Ensure that your golf cart is parked on a level surface and the key is turned off. This prevents any accidental movement during the reset process.
- Disconnect Battery Cables: To ensure safety, disconnect the battery cables from the battery terminals. Wear gloves and eye protection to protect yourself from any potential sparks or electrical hazards.
Taking these safety measures will help prevent any accidents or damage while resetting the golf cart battery meter.
Method 1: Resetting the Battery Meter Manually
In this method, we will explore how to manually reset the battery meter, depending on whether you have an analog or digital battery meter. Follow the instructions below based on the type of meter you have.
A. Resetting Analog Battery Meters
Analog battery meters use a needle to indicate the battery charge level. Here’s how to reset them:
- Accessing the Battery Compartment: Locate the battery compartment in your golf cart. It is typically found under the seat or in the front compartment. Open the compartment to access the battery meter.
- Resetting the Needle: Using a small tool or screwdriver, gently reset the needle to the zero position. Carefully position the needle at the lowest end of the scale, indicating a fully discharged battery.
By resetting the needle to zero, you recalibrate the analog battery meter for accurate readings.
B. Resetting Digital Battery Meters
Digital battery meters feature a digital display that shows the battery charge level. To reset them, follow these steps:
- Identifying the Reset Button: Locate the reset button on the battery meter. It is usually labeled “Reset” or indicated by a small icon.
- Resetting the Battery Meter: Press and hold the reset button for a specific duration, typically a few seconds, to initiate the reset process. Release the button once the reset is complete.
Resetting the digital battery meter will restore it to its default settings, resolving any inaccuracies or issues.
Method 2: Resetting the Battery Meter through Battery Discharge
In addition to manual resetting, an alternative method to reset the golf cart battery meter is through battery discharge. This method helps recalibrate the meter by fully discharging and then recharging the battery. Follow the steps below:
A. Fully Discharging the Battery
- Driving the Golf Cart: Take your golf cart to a safe, flat surface where you can drive it freely. Drive the cart until the battery charge is completely depleted. Pay attention to any warning indicators or signs of low battery during the process.
- Resting Period: After fully discharging the battery, allow it to rest for a short period, typically around 15 to 30 minutes. This rest period allows the battery voltage to stabilize before proceeding to the next step.
B. Recharging the Battery
- Connecting the Charger: Connect the charger to the battery according to the manufacturer’s instructions. Ensure that the charger is compatible with your golf cart battery and follow any specific guidelines provided.
- Charging Process: Start the charging process by turning on the charger. Allow the battery to charge fully until the charger indicates completion. This process may take several hours, depending on the battery capacity and charger specifications.
By fully discharging and recharging the battery, you reset the battery meter’s reference points, improving its accuracy in reflecting the battery’s charge level.
Post-Reset Steps: Verifying and Calibrating the Battery Meter
After resetting the golf cart battery meter, it’s important to verify its functionality and calibrate it if necessary. Follow these steps:
- Observing the Battery Meter: Turn on the golf cart and observe the battery meter readings. Ensure that the meter displays accurate and stable readings, reflecting the battery’s charge level.
- Calibration (if needed): If you notice any inconsistencies or inaccuracies in the battery meter readings, consult the manufacturer’s guidelines or specific calibration procedures for your golf cart model. Calibration procedures may involve manual adjustments or inputting specific codes to recalibrate the meter.
By verifying and calibrating the battery meter, you ensure that it provides accurate readings for effective battery monitoring.
Additional Tips for Battery Meter Accuracy and Maintenance
To maintain accurate battery meter readings and optimize the performance of your golf cart battery, consider the following tips:
- Regular Cleaning: Clean the battery terminals and connections regularly to ensure proper electrical contact. Use a battery terminal cleaner or a mixture of baking soda and water to remove any corrosion or buildup.
- Monitoring Battery Water Levels (for flooded lead-acid batteries): If your golf cart uses flooded lead-acid batteries, regularly check and maintain the proper water levels in each battery cell. Follow the manufacturer’s guidelines for adding distilled water when necessary.
- Proper Charging Habits: Follow recommended charging practices for your golf cart batteries. Avoid overcharging or undercharging, as it can impact the accuracy of the battery meter and reduce the overall battery lifespan.
By implementing these tips, you can improve the accuracy and longevity of your golf cart battery meter, ensuring optimal performance and longer battery life.
Conclusion:
Resetting the golf cart battery meter is essential to maintain accurate battery monitoring and optimize the performance of your golf cart. Whether you choose to reset the meter manually or through battery discharge, following the step-by-step guide in this article will help you recalibrate the meter and regain accurate readings. Remember to assess the current state of your battery meter, take safety precautions, and verify the meter’s accuracy after the reset. By taking these steps and implementing additional tips for battery maintenance, you’ll ensure optimal battery performance and enjoy uninterrupted rounds on the golf course.


