How To Test A Golf Cart Battery Charger
Welcome to the world of golf cart maintenance! One of the key components that ensures your golf cart is always ready for action is the battery charger. Regularly testing your golf cart battery charger is essential to ensure that it is operating efficiently and effectively. In this comprehensive guide, we will walk you through the process of testing a golf cart battery charger, providing you with the knowledge and steps necessary to assess its performance and address any potential issues.
A well-functioning battery charger is crucial for maintaining the health and longevity of your golf cart’s batteries. By regularly testing your charger, you can identify any problems or inefficiencies early on, allowing for timely maintenance and repairs. Whether you own an electric golf cart or a gas-powered cart with a battery-based electrical system, proper testing of the battery charger is essential.
In this guide, we will explore various testing methods, including checking the charger’s output voltage, assessing its charging efficiency, and examining the charger’s components for any signs of wear or damage. We will also provide troubleshooting tips and offer maintenance suggestions to keep your battery charger in optimal condition.
So, if you’re ready to ensure that your golf cart battery charger is up to the task, let’s dive into the world of testing and maintenance to keep your golf cart powered and ready for your next round of golfing fun!
Why Test Your Golf Cart Battery Charger?
Before we dive into the testing process, let’s understand why it’s important to test your golf cart battery charger. A faulty charger can lead to various problems, including insufficient charging, reduced battery life, and even potential damage to the cart’s electrical system. By regularly testing your charger, you can catch any issues early and take corrective measures to ensure efficient charging and prolong the lifespan of your batteries.
Preparing for Testing
Before you begin testing, it’s crucial to prioritize safety and gather the necessary tools and equipment. Safety precautions should never be overlooked when dealing with electrical components. Additionally, having the right tools on hand will enable you to accurately assess the charger’s performance.
Safety Precautions
When working with a golf cart battery charger, safety should be the top priority. Ensure that you have a clean and well-ventilated workspace. Always wear appropriate protective gear, such as safety glasses and gloves, to minimize the risk of injury. Additionally, disconnect the charger from the power source before conducting any tests to prevent electric shock.
Gather Necessary Tools and Equipment
To properly test your golf cart battery charger, you will need a few essential tools and equipment. Here’s a list of items you should have:
- Multimeter: A multimeter is a versatile tool that allows you to measure various electrical parameters. It’s instrumental in assessing the charger’s output voltage and other important readings.
- Safety Equipment: Safety glasses, gloves, and other protective gear to ensure your well-being while working with electrical components.
- Charging Specifications: The manufacturer’s specifications for your specific charger model. This will serve as a reference point during testing and help you determine if the charger is performing within the expected range.
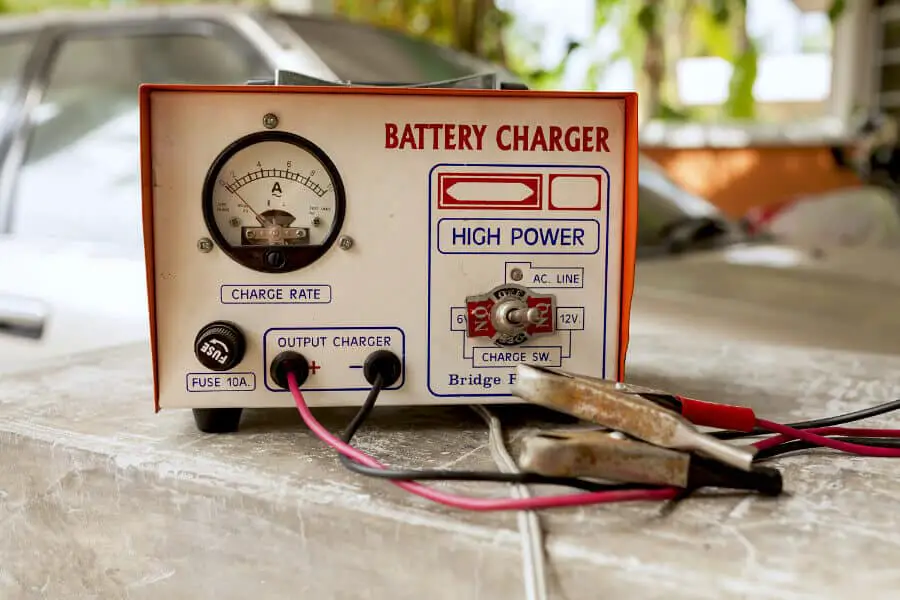
Checking the Charger Output Voltage
The output voltage of your golf cart battery charger is a critical parameter to evaluate during testing. It directly affects the charging process and the overall performance of your batteries. Let’s explore how you can measure and interpret the charger’s output voltage using a multimeter.
Using a Multimeter
A multimeter is an essential tool for measuring electrical quantities, including voltage. Before using a multimeter, it’s important to understand its various settings and functions. Familiarize yourself with the different voltage ranges and settings available on your specific multimeter model.
To measure the output voltage of your charger:
- Connecting the Multimeter: Begin by setting your multimeter to the appropriate voltage range, typically DC voltage. Connect the multimeter leads to the charger’s output terminals, ensuring proper polarity.
- Reading and Interpreting the Output Voltage: Once the connections are secure, turn on the multimeter and observe the voltage reading displayed on the screen. The reading should correspond to the charger’s output voltage specifications. If the reading deviates significantly from the expected range, it may indicate a problem with the charger.
It’s important to note that the specific voltage range and acceptable deviations vary depending on your charger model. Refer to the manufacturer’s specifications to determine the ideal output voltage for your charger.
Assessing Charging Efficiency
Apart from checking the charger’s output voltage, it’s crucial to evaluate its charging efficiency. This involves monitoring the charging time and assessing the performance of the battery after charging.
Monitoring the Charging Time
The time it takes to fully charge your golf cart battery can provide insights into the charger’s efficiency. Keep track of the charging time and compare it to the manufacturer’s specifications or previous charging cycles. A significant deviation from the expected charging time may indicate a problem with the charger’s performance.
Checking Battery Performance
After the charging cycle is complete, it’s important to assess the performance of the battery. Start by testing the battery’s voltage using a multimeter. A fully charged battery should have a voltage within the acceptable range specified by the manufacturer. Additionally, consider conducting a load test to evaluate the battery’s capacity and overall health.
Testing Charger Components
Apart from evaluating the charger’s output voltage and charging efficiency, it’s also important to inspect the charger components for any signs of wear or damage. Let’s explore the key components to check during testing.
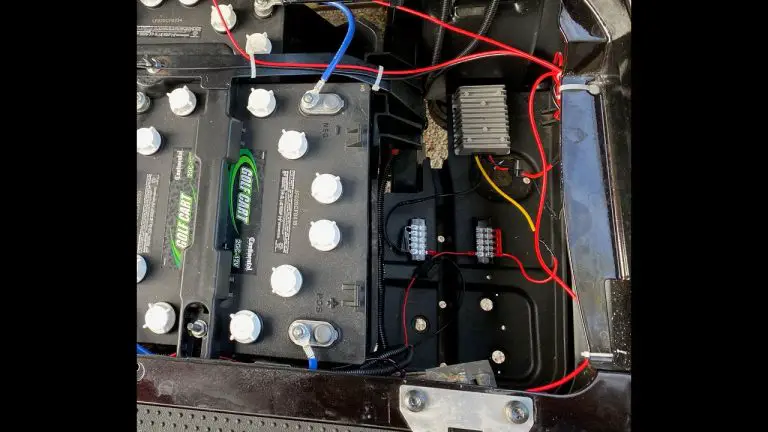
Inspecting Cables and Connections
Inspect the cables, connectors, and terminals of your golf cart battery charger for any signs of wear, corrosion, or loose connections. Damaged or corroded components can hinder the charging process and lead to inefficiencies. If you notice any issues, such as frayed cables or corroded terminals, take the necessary steps to repair or replace them.
Verifying Charger Settings and Modes
Different golf cart battery chargers may offer various settings and modes to suit different battery types and charging requirements. It’s important to verify that the charger is set to the correct mode for your battery type, such as flooded lead-acid, gel, or AGM. Refer to the charger’s manual for instructions on adjusting settings and ensure they are properly configured for optimal charging performance.
Troubleshooting Charger Issues
During the testing process, you may encounter certain issues or discrepancies that require troubleshooting. Let’s explore some common charger problems and the corresponding corrective actions.
Identifying Common Charger Problems
- No Output Voltage: If the charger fails to provide any output voltage, it may indicate a problem with the internal components or a faulty connection. Check the power source, connections, and internal fuses, if applicable.
- Low or Inconsistent Output Voltage: Inadequate or fluctuating output voltage can be caused by various factors, including component failures or incorrect settings. Inspect the charger’s internal components and ensure proper configuration of voltage settings and modes.
- Overheating: Excessive heat generation during charging is a common issue that can affect the charger’s performance and lifespan. Ensure proper ventilation, clean any dust or debris from the charger’s cooling vents, and consider using a charger with built-in thermal protection.
- Slow Charging: If the charging time is significantly longer than usual, it may indicate a problem with the charger or the battery. Check for loose connections, verify the charger settings, and assess the battery’s condition.
Taking Corrective Actions
When troubleshooting charger issues, it’s essential to follow the manufacturer’s guidelines and consult professional assistance when necessary. Here are some general corrective actions to consider:
- Check and Clean Connections: Ensure all connections are secure and free from debris or corrosion. Clean the terminals and connectors as needed.
- Verify Charger Settings: Review the charger’s settings and ensure they are correctly configured for your battery type and charging requirements.
- Replace Faulty Components: If you identify any damaged or malfunctioning components, such as fuses or internal circuitry, consider replacing them with compatible replacements.
- Seek Professional Assistance: If you encounter complex issues or are unsure about the troubleshooting process, it’s best to seek help from a professional or contact the charger’s manufacturer for support.
Maintenance and Care for the Battery Charger
To ensure the longevity and optimal performance of your golf cart battery charger, regular maintenance and care are crucial. Let’s explore some essential practices to keep your charger in top shape.
Regular Cleaning and Inspection
Periodically clean your charger to remove dust, dirt, and other contaminants that can affect its performance. Use a soft, dry cloth to wipe the exterior surfaces, and ensure the cooling vents are free from any blockages. Additionally, inspect the charger for any signs of damage or wear, and address any issues promptly.
Proper Storage and Handling
When the charger is not in use, proper storage is important to prevent damage and maintain its functionality. Store the charger in a cool, dry place, away from direct sunlight and extreme temperatures. Avoid placing heavy objects on top of the charger, as it may lead to physical damage. Follow the manufacturer’s guidelines for specific storage recommendations.
Conclusion
Regularly testing your golf cart battery charger is essential for ensuring efficient charging and prolonging the lifespan of your batteries. By following the testing procedures outlined in this guide and addressing any issues that arise, you can maintain optimal performance and reliability for your golf cart. Remember to prioritize safety during testing, consult the manufacturer’s instructions, and seek professional assistance when needed. With a properly functioning charger, you can enjoy extended battery life, consistent performance, and uninterrupted golfing adventures.