How To Test Golf Cart Batteries

Welcome to the world of golf cart maintenance! Golf cart batteries are the lifeblood of your electric golf cart, providing the power needed for a smooth and enjoyable ride on the course. However, over time, batteries can degrade and lose their capacity, affecting the performance and longevity of your golf cart. That’s why it’s essential to regularly test your golf cart batteries to ensure they are in optimal condition.
In this comprehensive guide, we will walk you through the process of testing golf cart batteries, providing you with the knowledge and steps necessary to assess their health and performance. Whether you’re a golf cart owner or a golf course manager, understanding how to test batteries is crucial for maintaining a reliable fleet of carts and ensuring a seamless golfing experience.
Testing your golf cart batteries allows you to gauge their state of charge, assess their capacity, and identify any potential issues that may affect their performance. By proactively testing and maintaining your batteries, you can prevent unexpected breakdowns, extend battery life, and maximize the overall efficiency of your golf cart.
So, if you’re ready to dive into the world of golf cart battery testing, let’s explore the step-by-step process to ensure that your batteries are ready to power your golfing adventures!

Why Test Your Golf Cart Batteries?
Before we delve into the testing process, let’s understand why testing your golf cart batteries is important. Golf cart batteries, just like any other battery, can experience performance degradation over time. Regular testing allows you to identify any issues, such as low voltage, capacity loss, or cell imbalance, that may affect the overall performance and lifespan of the batteries. By testing your golf cart batteries, you can take appropriate measures to address any problems and ensure reliable power for your golf cart.
Preparing for Battery Testing
Before you begin testing your golf cart batteries, it’s important to take some preparatory steps to ensure safety and accuracy. Let’s explore the necessary preparations before diving into the testing process.
Safety Precautions
Safety should always be a top priority when working with batteries. Ensure you have the following safety measures in place before testing your golf cart batteries:
- Protective Gear: Wear safety glasses and gloves to protect yourself from any potential hazards.
- Well-Ventilated Area: Perform battery testing in a well-ventilated area to minimize the risk of inhaling harmful gases.
- Tools and Equipment: Gather the necessary tools and equipment, including a voltmeter or multimeter, hydrometer, and safety equipment, before starting the testing process.
Gather Necessary Tools and Equipment
To effectively test your golf cart batteries, you will need a few essential tools and equipment. Here’s a list of items you should have on hand:
- Voltmeter or Multimeter: A voltmeter or multimeter allows you to measure the voltage of your batteries, providing insight into their state of charge and overall health.
- Hydrometer: A hydrometer measures the specific gravity of the battery electrolyte, which helps determine the state of charge and the condition of individual battery cells.
- Battery Load Tester: A battery load tester assesses the battery’s capacity and ability to deliver power under load conditions.
- Safety Equipment: Safety glasses and gloves to protect yourself while handling batteries.
Testing Battery Voltage
Testing the voltage of your golf cart batteries is a fundamental step in assessing their overall health and state of charge. Let’s explore the process of testing battery voltage and interpreting the results.
Using a Voltmeter or Multimeter
To test the voltage of your golf cart batteries, follow these steps:
- Set your voltmeter or multimeter to the DC voltage setting.
- Connect the positive (+) lead of the meter to the positive terminal of the first battery in the series.
- Connect the negative (-) lead of the meter to the negative terminal of the same battery.
- Read and record the voltage displayed on the meter.
- Repeat this process for each battery in the series.
Once you have measured the voltage of each battery, compare the readings to the manufacturer’s specifications or reference charts to assess their state of charge and overall health.
Understanding State of Charge
The voltage readings of your golf cart batteries can provide valuable information about their state of charge. Here are some general guidelines to help you interpret the voltage readings:
- A fully charged battery typically reads around 12.6 to 12.8 volts.
- A voltage reading below 12.2 volts indicates a partially discharged battery that may require recharging.
- If the voltage reading is significantly lower than expected, it may indicate a weak or failing battery that requires further testing and assessment.
Load Testing the Batteries
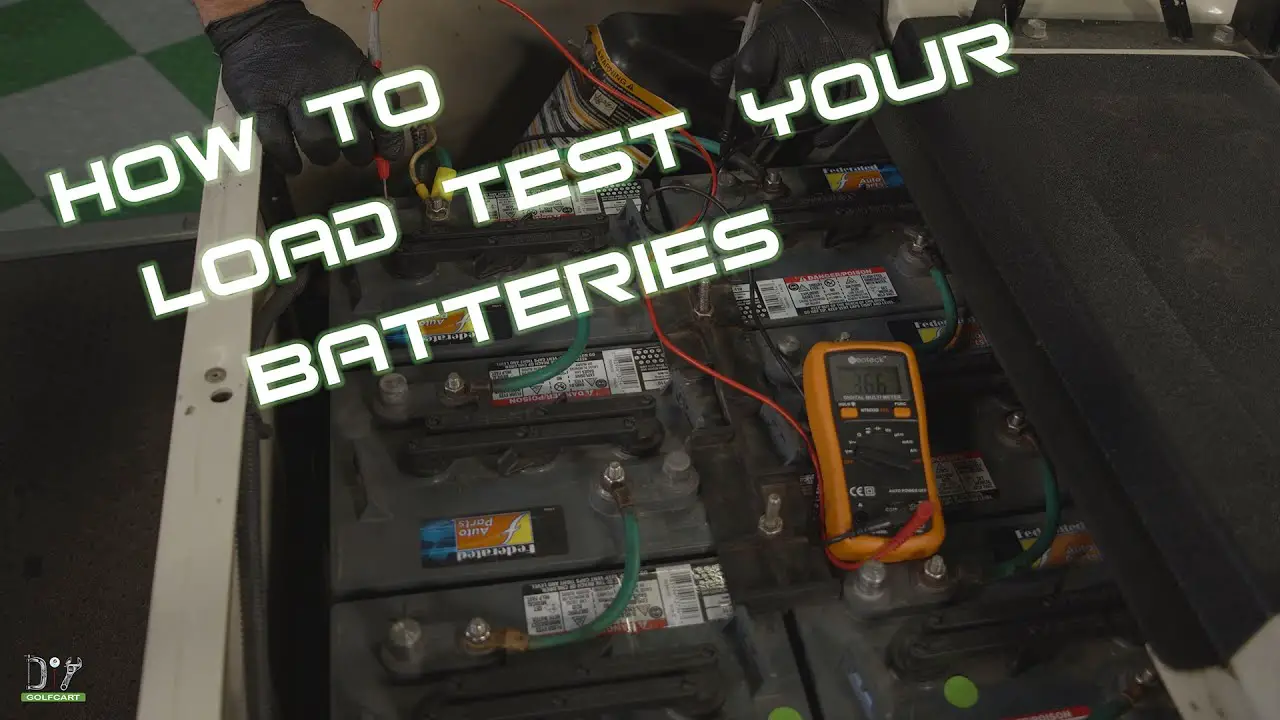
While voltage testing provides valuable information, load testing goes a step further by evaluating the batteries’ capacity to deliver power under load conditions. Load testing helps identify batteries with reduced capacity or internal problems. Let’s explore how to perform a load test on your golf cart batteries.
Performing a Load Test
To load test your golf cart batteries, you will need a battery load tester. Follow these steps:
- Connect the load tester’s positive and negative leads to the corresponding battery terminals.
- Set the load tester to the appropriate load level recommended for your batteries.
- Activate the load tester and let it run for the specified duration.
- Observe the voltage drop during the load test and compare it to the manufacturer’s specifications.
- Assess the battery’s performance based on the voltage drop and the recommended thresholds.
Load testing helps identify weak or failing batteries that may struggle to deliver power under demanding conditions, such as driving uphill or carrying heavy loads. If a battery fails the load test, it is recommended to replace it to maintain optimal performance.
Assessing Battery Health
Battery testing goes beyond voltage and load tests. It’s important to inspect and assess other aspects of battery health. Let’s explore some key areas to evaluate during the battery testing process.
Inspecting Battery Connections
Inspecting the battery connections is crucial for ensuring a reliable electrical connection and optimal performance. Look for any signs of corrosion, loose or damaged terminals, or poor connections. Clean the terminals and cables, and tighten any loose connections. Properly secured and clean connections help maintain efficient power transfer and extend battery life.
Checking for Battery Swelling or Damage
Physical inspection of the batteries is essential to identify signs of swelling, leaks, or other physical damage. Swollen batteries indicate internal problems or excessive heat buildup. Leaks can lead to electrolyte loss and reduced battery performance. If you notice any signs of swelling, leaks, or physical damage, it is recommended to replace the affected battery promptly.
Troubleshooting Battery Issues
During the battery testing process, you may come across certain issues or discrepancies that require troubleshooting. Let’s explore common battery problems and the corresponding corrective actions.
Identifying Common Battery Problems
- Low Voltage: If a battery consistently measures low voltage, it may indicate sulfation or other internal issues.
- Reduced Capacity: Batteries with reduced capacity may not hold a charge for an extended period or deliver power consistently.
- Cell Imbalance: Cell imbalance occurs when individual battery cells have significant voltage differences, leading to uneven performance and reduced overall battery capacity.
Taking Corrective Actions
If you encounter any battery issues during testing, here are some corrective actions to consider:
- Recharging: If a battery has low voltage, attempt recharging using an appropriate battery charger. Monitor the charging process and ensure the battery reaches a full state of charge.
- Equalization: In cases of cell imbalance, equalization charging can help rebalance the individual cell voltages and improve overall battery performance.
- Replacement: If a battery consistently fails testing, shows signs of physical damage, or has reached the end of its lifespan, it is recommended to replace it with a new one.
Battery Maintenance and Care
Proper maintenance and care are essential to prolong the lifespan and ensure optimal performance of your golf cart batteries. Let’s explore some important practices for maintaining and caring for your batteries.
Regular Cleaning and Inspection
Periodically clean the battery terminals and surrounding areas to remove dirt, debris, and corrosion. Use a mixture of baking soda and water to clean corrosion on terminals. Inspect the batteries for any signs of damage, leaks, or swelling. Early detection and maintenance can prevent further issues and extend battery life.
Charging Practices
Follow proper charging practices to maximize battery life and performance:
- Use a charger specifically designed for golf cart batteries.
- Avoid overcharging or undercharging the batteries.
- Follow the manufacturer’s recommendations for charging times and voltages.
- Charge the batteries in a well-ventilated area away from flammable materials.
Storage Tips
If your golf cart will be inactive for an extended period, proper storage is crucial to maintain battery health:
- Fully charge the batteries before storage.
- Disconnect the batteries or use a battery disconnect switch to prevent self-discharge.
- Store the batteries in a cool and dry location away from direct sunlight.
Conclusion
Regularly testing your golf cart batteries is essential for ensuring optimal performance and longevity. By following the testing procedures outlined in this guide and taking proper maintenance measures, you can identify potential issues, extend battery life, and enjoy a reliable power source for your golf cart. Remember to prioritize safety during testing, consult the manufacturer’s instructions, and seek professional assistance when needed. With well-maintained and tested batteries, you can hit the greens with confidence and enjoy a smooth and uninterrupted golf cart experience.


