How To Wire 12 Volt Lights To A 36 Volt Golf Cart
Golf carts are not only a means of transportation on the golf course but also versatile vehicles that can be customized to suit individual needs and preferences. Adding lights to your golf cart can enhance visibility and safety, especially during early morning or evening rounds. However, if you have a 36-volt golf cart and want to wire 12-volt lights, you may wonder how to go about it. In this comprehensive guide, we will walk you through the process of wiring 12-volt lights to a 36-volt golf cart, ensuring that you can enjoy improved visibility and a safer golfing experience.
Understanding the electrical system of a 36-volt golf cart and the necessary components involved is crucial for a successful wiring setup. By following the step-by-step instructions and tips provided in this guide, you will be able to navigate through the process with confidence.
Whether you want to install headlights, taillights, or accent lights on your golf cart, this guide will cover the essential steps, wiring techniques, and safety considerations to ensure that your 12-volt lights are properly connected to your 36-volt golf cart’s electrical system. So let’s get started and shed some light on how to wire 12-volt lights to your 36-volt golf cart, allowing you to enjoy your rounds with enhanced visibility and style.

Understanding the Electrical System of a 36 Volt Golf Cart
Before diving into the wiring process, it’s crucial to have a basic understanding of the electrical system of a 36-volt golf cart. This knowledge will help you make informed decisions and ensure a successful wiring setup.
How does the Electrical System of a 36 Volt Golf Cart Work?
A 36-volt golf cart typically consists of a series of six 6-volt batteries connected in series to provide the necessary power. These batteries are connected to a controller that regulates the flow of electricity from the batteries to the motor, controlling the speed and performance of the golf cart.
To wire 12-volt lights to a 36-volt golf cart, a voltage reducer is required. The voltage reducer converts the higher voltage (36 volts) to a lower voltage (12 volts) required for powering lights and accessories. Understanding this key component is essential for a successful wiring setup.
Preparing for the Wiring Process
Before proceeding with the wiring process, proper preparation is crucial to ensure a smooth and effective installation.
Assessing the Golf Cart’s Electrical System
Start by assessing the condition of the golf cart’s electrical system. Ensure that the batteries are in good working condition and properly charged. Check for any loose connections or signs of damage. It’s important to have a solid foundation before adding any additional electrical components to your golf cart.
Determining Power Requirements for the Lights
To determine the power requirements for the 12-volt lights, consider factors such as the number of lights you plan to install and their wattage. The total power consumption should not exceed the capacity of the voltage reducer. By calculating the power requirements, you can ensure that your electrical system can handle the additional load.
Wiring 12 Volt Lights to a 36 Volt Golf Cart
Now, let’s dive into the step-by-step process of wiring 12-volt lights to your 36-volt golf cart. It’s important to follow these instructions carefully to ensure safety and proper functionality.
Step 1: Install a Voltage Reducer
The first step in wiring 12-volt lights to a 36-volt golf cart is to install a voltage reducer. The voltage reducer is a device that converts the higher voltage from the golf cart’s batteries to the lower voltage required for the lights.
To install the voltage reducer, locate a suitable location for it in your golf cart. It should be mounted securely and protected from any potential damage or exposure to moisture. Connect the input terminals of the voltage reducer to the positive and negative terminals of the battery pack, ensuring proper polarity.
Step 2: Plan the Wiring Setup
Before proceeding with the wiring process, plan the setup by determining the optimal locations for the lights and routing the wiring accordingly. Consider factors such as accessibility, visibility, and the overall aesthetic appearance of the cart. Planning the wiring setup in advance will help you streamline the installation process.
Step 3: Connect the Wiring
Begin by connecting the wiring from the voltage reducer to the lights. Ensure that you use appropriate gauge wires capable of handling the current required by the lights. It is recommended to use stranded copper wires for flexibility and durability. The exact wire size will depend on the total power consumption of the lights and the distance they need to be connected from the voltage reducer.
Carefully route the wires along the frame of the golf cart, securing them in place using zip ties or clips. Avoid sharp edges or areas prone to excessive heat or moisture. Maintain proper wire separation to prevent interference or short circuits.
Step 4: Connect to a Power Source
Once the wiring is in place, it’s time to connect the lights to the power source. Connect the positive (+) wire from each light to the positive terminal of the voltage reducer. Similarly, connect the negative (-) wire from each light to the negative terminal of the voltage reducer. Ensure secure connections and proper polarity to prevent any electrical issues.
Step 5: Test and Secure the Wiring
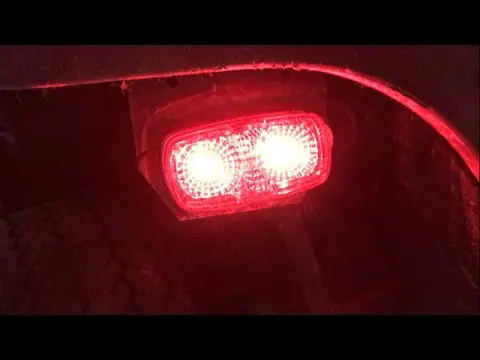
After completing the wiring connections, it’s important to test the lights to ensure they are functioning properly. Turn on the golf cart’s power and check if the lights illuminate as expected. Verify that all connections are secure and that there are no loose wires or potential hazards.
Once you have confirmed the functionality of the lights, secure the wiring using clips or adhesive mounts. Ensure that the wiring is properly protected and does not interfere with any moving parts or controls on the golf cart.
Tips for a Successful Wiring Installation
- Choose High-Quality Components: Invest in quality 12-volt lights and a reliable voltage reducer to ensure longevity and proper performance.
- Use Proper Insulation: Ensure that all wire connections are properly insulated using electrical tape, heat shrink tubing, or waterproof connectors to protect against moisture and prevent short circuits.
- Follow Safety Guidelines: Adhere to safety guidelines throughout the installation process. Turn off the golf cart’s power before making any electrical connections, and avoid working in wet conditions.
- Consult a Professional: If you’re unsure about any aspect of the wiring process, it’s always advisable to consult a professional or seek assistance from someone experienced in golf cart electrical systems.
By following these steps and tips, you can successfully wire 12-volt lights to your 36-volt golf cart, enhancing visibility and safety during your golfing adventures. Enjoy your rounds with illuminated pathways and a stylish-looking golf cart that stands out on the course.
Remember, proper maintenance and regular inspections of the wiring and electrical components are essential to ensure continued functionality and safety.
Conclusion
Wiring 12-volt lights to a 36-volt golf cart allows you to enhance visibility and safety during your golfing experience. By following the step-by-step process outlined in this guide, you can successfully install lights and enjoy illuminated pathways on the golf course.
Understanding the electrical system of a 36-volt golf cart, assessing its condition, and determining power requirements are crucial initial steps. Installing a voltage reducer is essential for converting the higher voltage to a suitable level for the lights. Planning the wiring setup, connecting the wiring, and testing the lights ensure a proper installation.
Remember to use high-quality components, properly insulate the connections, and follow safety guidelines throughout the process. If you have any doubts or concerns, consulting a professional is always a good idea to ensure a successful and safe wiring installation.
With the 12-volt lights in place, you can navigate the golf course with improved visibility during early morning or evening rounds. Enjoy the added safety and convenience that come with a well-lit golf cart.
Now it’s time to take your golfing experience to the next level by wiring 12-volt lights to your 36-volt golf cart. Illuminate your path, enhance safety, and make a stylish statement on the course. Happy golfing!