How To Install Seat Belts On A Golf Cart
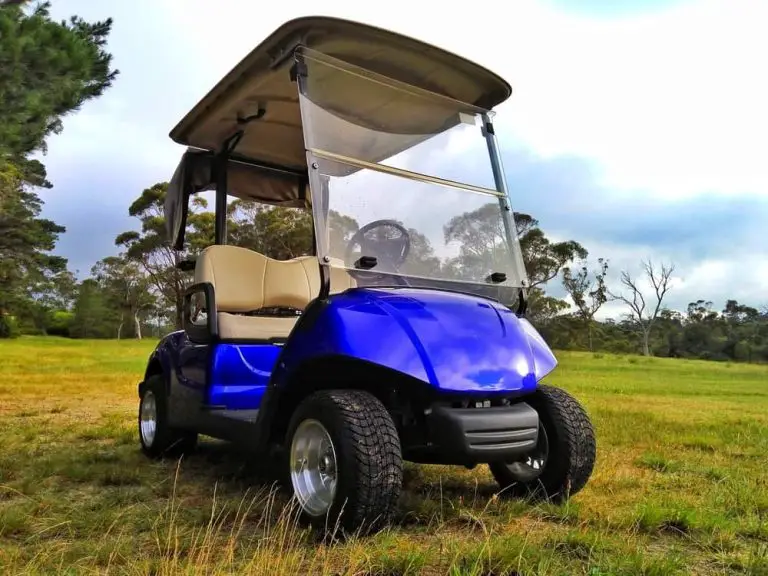
Golf carts have become increasingly popular not only on golf courses but also as a means of transportation in various settings. While these small vehicles offer convenience and mobility, it’s essential to prioritize safety for both the driver and passengers. One crucial safety measure that should not be overlooked is the installation of seat belts on golf carts.
In this comprehensive guide, we will take you through the step-by-step process of installing seat belts on a golf cart, ensuring that you have the knowledge and skills to enhance safety during every ride. Whether you own a personal golf cart, manage a fleet for a resort or community, or simply want to promote a culture of safety, this article will equip you with the necessary information to make informed decisions regarding seat belt installation.
We’ll begin by highlighting the importance of seat belts in golf carts and discussing the various types of seat belts suitable for these vehicles. We’ll then delve into the tools and equipment needed for the installation process. With a focus on practicality, we’ll provide detailed instructions on how to install seat belts on a golf cart and share essential safety considerations to ensure a successful and secure installation.
By the end of this guide, you’ll have a comprehensive understanding of the process and the confidence to install seat belts on your golf cart, prioritizing the safety and well-being of everyone on board. So let’s get started and make your golf cart rides safer than ever before!
Are Seat Belts Necessary for Golf Carts?
Before delving into the installation process, it’s crucial to understand the importance of seat belts in golf carts. Seat belts play a vital role in securing passengers and reducing the risk of injury during sudden stops, turns, or collisions. They help prevent ejection from the golf cart and minimize the impact of a collision on occupants. Additionally, many jurisdictions have regulations mandating the use of seat belts in golf carts for both on-road and off-road usage.
What Types of Seat Belts are Suitable for Golf Carts?
There are several types of seat belts available for golf carts, each with its own characteristics and levels of restraint. Let’s explore the common types:
1. Lap Belts: Lap belts are the most basic type of seat belts and consist of a single strap that secures across the passenger’s lap. While providing some level of restraint, lap belts may not offer full upper-body protection in the event of a collision.
2. Three-Point Seat Belts: Three-point seat belts feature both a lap belt and a shoulder belt that join together to form a “Y” shape across the passenger’s torso. These seat belts offer increased protection by restraining both the upper and lower body.
3. Four-Point Seat Belts: Four-point seat belts provide the highest level of restraint. In addition to the lap and shoulder belts, they include an additional strap that secures across the passenger’s midsection. These seat belts offer enhanced stability and security during sharp turns or uneven terrain.
When selecting seat belts for your golf cart, consider the size and seating configuration of your cart, as well as the comfort and preferences of the occupants. It’s important to choose seat belts that comply with safety regulations and are compatible with your specific golf cart model.
What Tools and Equipment are Needed for Seat Belt Installation?
To install seat belts on a golf cart, you’ll need a few tools and equipment. Here’s a list of commonly used items:
- Socket set: A socket set with various socket sizes will be handy for removing and securing bolts during the installation process.
- Screwdrivers: Keep a set of screwdrivers, including both flathead and Phillips-head, to assist with any fastening or loosening tasks.
- Wrenches: Having a set of wrenches, including adjustable wrenches or combination wrenches, will be useful for tightening nuts and bolts.
- Drill and drill bits: If your golf cart doesn’t have pre-drilled holes for seat belt installation, a drill and appropriate drill bits will be necessary to create the necessary openings.
In addition to the tools mentioned above, you may also need specific seat belt mounting brackets, bolts, nuts, and seat belt extenders (if required to accommodate larger passengers). Ensure that you have all the necessary tools and equipment before beginning the installation process.
How to Install Seat Belts on a Golf Cart
Now that you have a clear understanding of the importance of seat belts and have gathered the necessary tools and equipment, let’s dive into the step-by-step process of installing seat belts on your golf cart.
Determining the Seating Positions for Seat Belt Installation
Before you begin the installation, identify the seating positions in your golf cart where seat belts will be installed. Consider the number of seats and passengers that will require seat belts. Take into account the number of existing seat belts and the seating configuration of your golf cart. This step is crucial for ensuring that every passenger has access to a seat belt and that they are properly secured during travel.
Preparing the Golf Cart for Seat Belt Installation
To ensure a smooth installation process, it’s important to prepare the golf cart and create a suitable workspace. Follow these steps:
- Remove any existing seats or components: If your golf cart already has seats or other components installed in the designated seating positions, remove them carefully. This will provide you with easier access to the mounting areas for the seat belts.
- Clean the mounting areas: Thoroughly clean the mounting areas on the golf cart where the seat belts will be attached. Remove any dirt, debris, or rust that could interfere with the installation process. A clean and secure mounting surface will ensure the seat belts are properly fastened and stable.
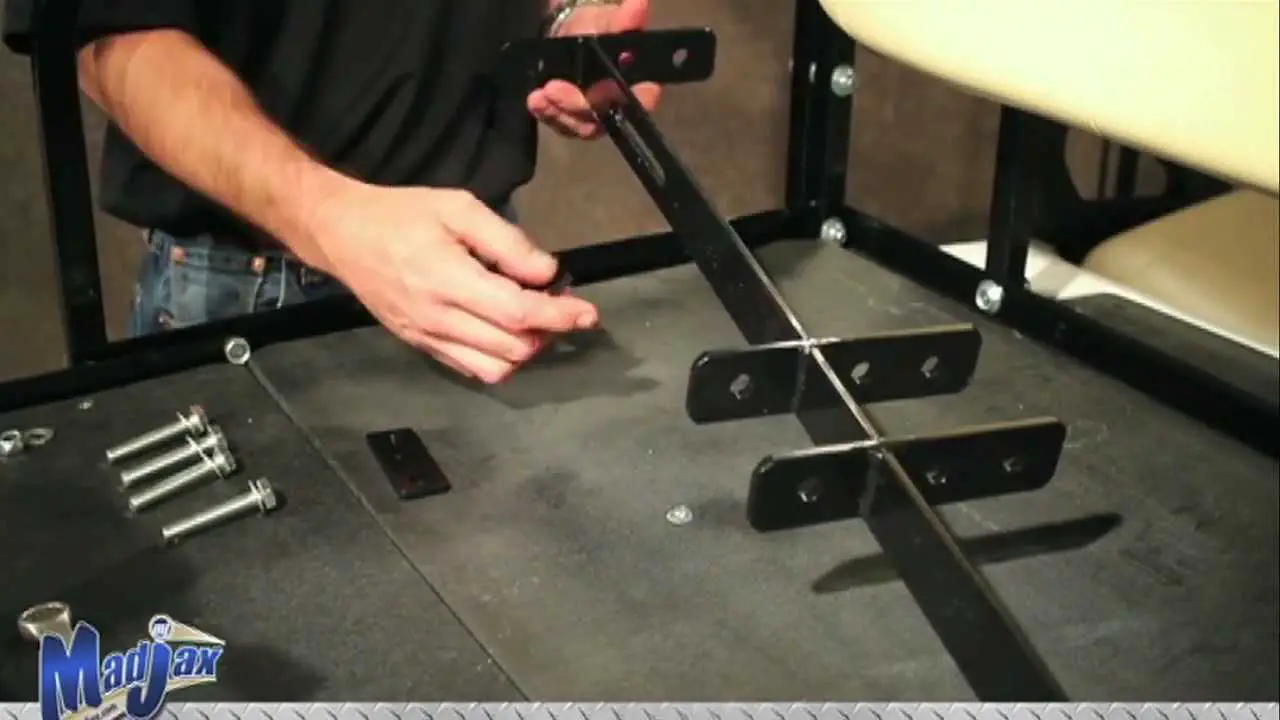
Installing the Seat Belt Mounting Brackets
Seat belt mounting brackets serve as the anchor points for securing the seat belts to the golf cart. Follow these steps to install them correctly:
- Position the brackets: Place the seat belt mounting brackets in the desired locations on the golf cart’s structure or seats. Ensure that the brackets align with the seating positions you identified earlier.
- Secure the brackets: Using the appropriate tools, such as a socket set or wrench, tighten the bolts to securely fasten the mounting brackets. Make sure they are firmly attached and capable of withstanding the forces exerted during normal use.
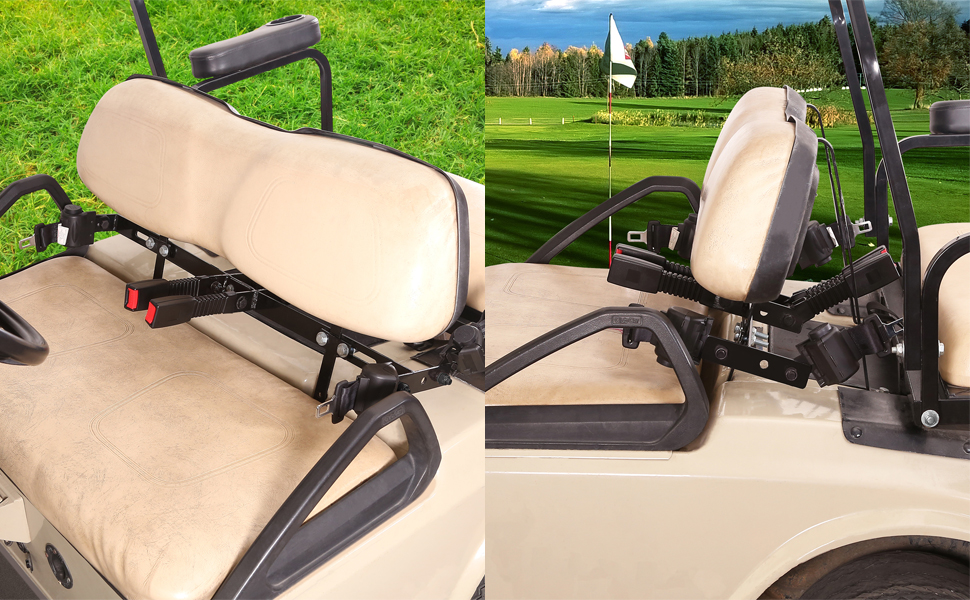
Securing the Seat Belts to the Mounting Brackets
With the mounting brackets in place, it’s time to attach the seat belts. Follow these steps to ensure proper installation:
- Thread the seat belt straps: Insert the seat belt straps through the designated openings on the mounting brackets. Pay attention to the orientation of the seat belt, ensuring that the lap belt and shoulder belt are correctly positioned.
- Fasten the seat belt buckles: Secure the seat belt buckles by inserting them into the corresponding buckles on the opposite end of the seat belt. Double-check that the buckles are securely engaged to prevent accidental unbuckling.
- Adjust the seat belt length: Depending on the size and preference of the passengers, you may need to adjust the seat belt length. Most seat belts come with adjustable straps that can be lengthened or shortened. Ensure that each seat belt provides a snug and comfortable fit for the passengers.
Adjusting and Testing the Seat Belts for Proper Fit and Functionality
After installing the seat belts, it’s crucial to perform a thorough check to ensure they are properly adjusted and functioning correctly:
- Check the seat belt tension: Ensure that each seat belt is properly tensioned, neither too loose nor too tight. The lap belt should fit snugly across the passenger’s lap, and the shoulder belt should rest comfortably over the shoulder and chest.
- Test the seat belt buckles: Verify that the seat belt buckles can be easily fastened and securely locked. Try releasing the buckles to ensure they release smoothly and reliably.
- Perform a trial run: Before hitting the road, conduct a test drive to assess the functionality of the seat belts. Accelerate, brake, and make turns to determine if the seat belts provide the necessary restraint and comfort for passengers.
Are There Any Safety Considerations When Installing Seat Belts?
While installing seat belts on a golf cart enhances safety, it’s important to keep a few key safety considerations in mind during the installation process:
- Proper placement of seat belt mounting brackets: Ensure that the seat belt mounting brackets are installed in sturdy areas of the golf cart’s structure. Avoid weak or unstable points that may compromise the integrity of the seat belt installation. It’s essential to choose robust mounting locations that can withstand the forces exerted during sudden stops or collisions.
- Tightening bolts and ensuring secure attachment: When securing the seat belt mounting brackets, make sure to tighten the bolts properly. Loose brackets can lead to seat belt instability and compromised safety. Regularly check the tightness of the bolts to ensure they remain secure over time.
- Conducting post-installation checks for stability and functionality: After installing the seat belts, perform a final inspection to ensure their stability and functionality. Confirm that the seat belts are securely attached to the mounting brackets and that the buckles engage and disengage smoothly. Additionally, verify that the seat belts do not impede the operation of any other components in the golf cart.
Additional Safety Measures for Golf Cart Usage
Installing seat belts is a significant step toward enhancing safety in your golf cart, but it’s important to remember that it’s just one part of a comprehensive safety strategy. Consider implementing these additional safety measures:
- Regular maintenance and inspection of seat belts: Schedule regular inspections of your golf cart’s seat belts to check for signs of wear, fraying, or damage. Replace any damaged seat belts promptly to ensure continued safety.
- Proper usage and wearing of seat belts by passengers: Emphasize the importance of wearing seat belts to all passengers using the golf cart. Educate them on how to properly wear and adjust seat belts for maximum effectiveness. Encourage a culture of safety that prioritizes seat belt usage during every ride.
- Speed and maneuvering precautions for safe golf cart operation: Observe speed limits and practice safe maneuvering techniques when operating a golf cart. Avoid sharp turns, excessive speed, and reckless driving behaviors that can increase the risk of accidents. Remember that seat belts are most effective when combined with responsible driving habits.
Conclusion
Installing seat belts on your golf cart is a proactive and responsible step toward ensuring the safety of yourself and your passengers. By following the proper installation procedures and adhering to safety guidelines, you can enjoy the added protection and peace of mind that seat belts provide. Remember, seat belts save lives, and it’s crucial to make them an integral part of every golf cart journey. Stay safe and enjoy your golf cart adventures responsibly!