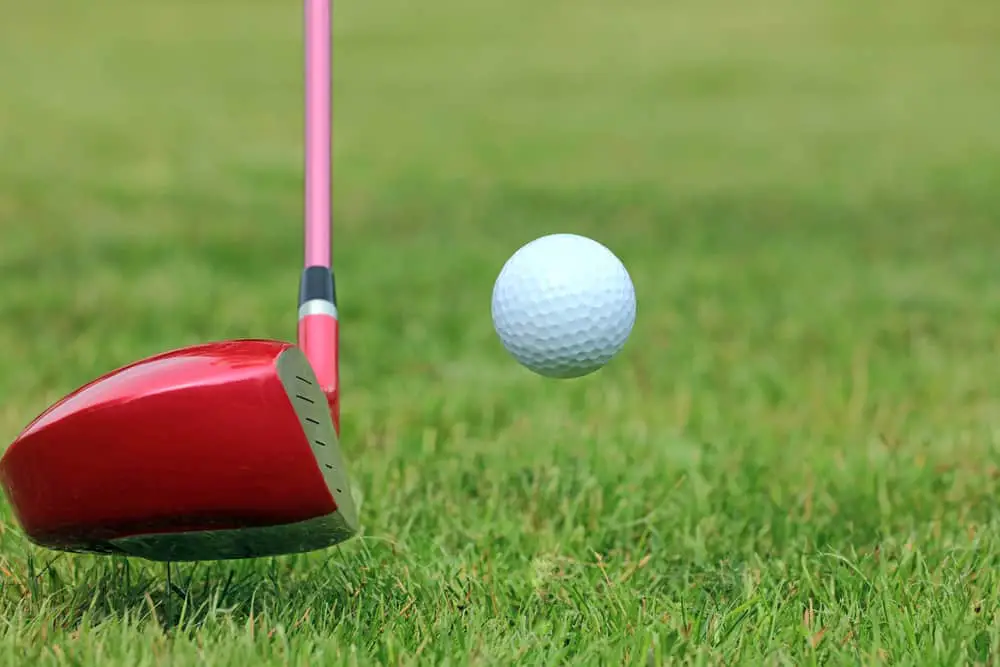
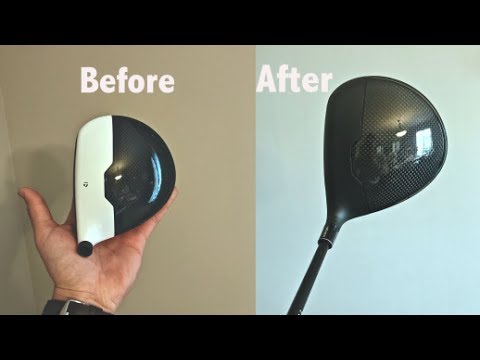
How To Paint A Golf Driver Head
Golf is not only a game of precision and skill but also a means of self-expression. Just as you tailor your swing and select the perfect clubs, customizing your golf equipment allows you to make a personal statement on the course. One way to add a touch of individuality and protect your gear is by painting your golf driver head. Painting a golf driver head offers a creative outlet, allowing you to showcase your unique style and personality.
In this comprehensive guide, we will delve into the art of painting a golf driver head. From selecting the right materials and equipment to mastering the step-by-step process, we’ll provide you with the knowledge and techniques to create a stunning, custom look for your driver. Whether you want to add vibrant colors, intricate designs, or a simple yet elegant finish, this guide will equip you with the tools to transform your driver head into a work of art.
Get ready to explore your artistic side as we take you through the journey of painting a golf driver head. From preparation to final touches, we’ll guide you every step of the way, ensuring maximum creativity, durability, and a personalized touch to your beloved golf equipment. Let’s dive in and unlock the painter within you!
Gathering the Necessary Materials and Equipment
Before diving into the painting process, it’s important to gather all the essential materials and equipment. Here’s a list of items you’ll need:
| Materials and Equipment | Description |
|---|---|
| Golf driver head | The driver head that you want to paint |
| Masking tape | Used to protect areas that should not be painted |
| Sandpaper | Helps in preparing the surface for painting |
| Primer | Provides a smooth and adhesive surface for the paint |
| Paint | Choose a high-quality paint suitable for golf clubheads |
| Brushes and/or airbrush | Used to apply the paint |
| Clear coat | Provides a protective layer and adds gloss |
| Drop cloth or newspaper | To protect the work area from paint spills |
Ensure you have all the necessary materials before starting the painting process. Using high-quality products will result in a durable and visually appealing finish.
Preparing the Golf Driver Head for Painting
To achieve a professional-looking paint job, proper preparation is essential. This involves cleaning the driver head and removing any old paint or finish. Here’s how to prepare the golf driver head:
Cleaning the Golf Driver Head
Start by thoroughly cleaning the driver head to remove any dirt, grease, or debris. Use a mild detergent or soapy water and a soft cloth or brush to gently scrub the surface. Rinse it with clean water and pat it dry using a lint-free cloth. Ensuring a clean surface will promote better adhesion of the paint.
Removing the Old Paint or Finish
If there is any old paint or finish on the driver head, it needs to be removed before proceeding with the painting process. Use sandpaper with a fine grit to gently sand the surface and remove the old paint. Be careful not to damage the underlying metal or material of the driver head. Once the old paint is removed, clean the head again to remove any residue from the sanding process.
Sanding and Smoothing the Surface of the Golf Driver Head
To create a smooth surface for the paint to adhere to, lightly sand the driver head using a fine-grit sandpaper. This step helps in removing any imperfections or scratches, ensuring a flawless finish. Sand in a circular motion, paying attention to the curves and contours of the head. After sanding, wipe away any dust with a clean cloth.
Masking Off Areas That Should Not Be Painted
To maintain a clean and professional paint job, it’s important to protect areas of the driver head that should not be painted. This can be achieved by using masking tape to cover these areas. Take your time during this step to ensure precise masking. Here’s how to do it:
- Identify the Areas of the Golf Driver Head That Need to be Masked:
- Hosel: The connection point between the driver head and the shaft.
- Face: The part of the head that strikes the golf ball.
- Grooves: The textured area on the face of the driver head.
- Adjustable Weight Ports: If your driver head has adjustable weight ports, cover them as well to prevent paint from affecting their functionality.
- Properly Applying Masking Tape to Protect Desired Areas from Paint:
- Start by tearing off a piece of masking tape and carefully place it along the edges of the areas you want to protect.
- Press down firmly to ensure a tight seal and prevent paint from seeping through.
- Use additional pieces of tape as needed to cover the entire area that should not be painted.
Taking the time to mask off these areas will help you achieve clean, crisp lines and prevent accidental paint application where it’s not desired.
Applying Primer to the Golf Driver Head
Priming the driver head is a crucial step in the painting process. It helps create a smooth surface for the paint to adhere to and improves the longevity of the finish. Here’s how to apply primer to the golf driver head:
Importance of Primer in Promoting Adhesion and Longevity of the Paint
Primer serves as a bonding agent between the driver head and the paint. It enhances adhesion, provides a consistent base color, and improves the durability of the paint job. Using primer ensures a professional-looking finish that will withstand the rigors of the game.
Selecting the Right Type of Primer for Golf Driver Heads
Choose a primer specifically designed for use on metal or composite surfaces. Look for primers that offer excellent adhesion, corrosion resistance, and compatibility with the type of paint you plan to use. Consult with a local paint store or professional to help you select the appropriate primer for your driver head.
Applying Primer Evenly and Allowing Sufficient Drying Time
Follow these steps to apply the primer to the golf driver head:
- Shake the primer can thoroughly to ensure proper mixing of the contents.
- Hold the can approximately 8-12 inches away from the driver head.
- Apply a light, even coat of primer to the entire surface of the head.
- Allow the primer to dry according to the manufacturer’s instructions. This usually takes about 30 minutes to an hour, but drying times may vary.
Avoid applying thick coats of primer as it can lead to drips or an uneven finish. Multiple thin coats are preferred to build up coverage gradually.
Applying Base Coat and Desired Design
Once the primer is dry, it’s time to apply the base coat and add your desired design to the driver head. This is where your creativity can shine. Follow these steps for a successful base coat application and design incorporation:
Choosing the Base Coat Color for the Golf Driver Head
Select a high-quality paint suitable for use on golf clubheads. Consider the overall aesthetics you want to achieve and choose a color that complements your style. Popular choices include solid colors, metallic finishes, or even custom designs.
Applying the Base Coat and Achieving a Smooth, Even Finish
Follow these steps to apply the base coat to the golf driver head:
- Shake the paint can thoroughly to ensure proper mixing.
- Hold the can at the same distance as when applying the primer.
- Apply thin, even coats of paint to the entire surface of the head, allowing each coat to dry before applying the next.
- Apply multiple coats until you achieve the desired depth of color and coverage. Be patient and take your time to avoid drips or runs in the paint.
It’s important to maintain a steady hand and use smooth, sweeping motions while applying the paint. This will help achieve a consistent and professional-looking finish.
Adding Desired Designs, Logos, or Patterns to the Golf Driver Head
If you want to add custom designs, logos, or patterns to your driver head, now is the time to do so. You can use stencils, decals, or even freehand techniques to create unique designs. Here are a few tips for incorporating designs into your paint job:
- Stencils: Use pre-made stencils or create your own to add intricate designs or patterns. Secure the stencil in place using masking tape and carefully apply the paint over the stencil, ensuring clean lines and sharp edges.
- Freehand Techniques: If you’re confident in your artistic abilities, you can freehand your designs directly onto the driver head using fine brushes or paint pens. Take your time and plan out your design before applying the paint.
- Logos or Decals: If you have access to golf club manufacturer logos or other decals, you can incorporate them into your design. Apply them carefully to the driver head following the manufacturer’s instructions, ensuring they are securely affixed.
Remember to let each layer of paint dry thoroughly before moving on to the next step. Patience and attention to detail during this stage will result in a visually stunning and personalized driver head.
Applying Clear Coat for Protection and Gloss
Once the base coat and designs are complete, it’s essential to apply a clear coat to provide protection and add a glossy finish to the driver head. Follow these steps to apply the clear coat:
Understanding the Purpose of Clear Coat for Golf Driver Heads
Clear coat serves as a protective layer for the paint and underlying layers. It enhances the durability of the finish, prevents chipping and scratching, and adds a glossy sheen to the driver head. The clear coat also helps protect the paint from exposure to UV rays, moisture, and other elements on the golf course.
Selecting the Appropriate Clear Coat for the Desired Finish
Choose a clear coat specifically formulated for use on golf clubheads or metal surfaces. Look for a clear coat that offers UV protection, abrasion resistance, and a glossy finish. Consult with a paint store or professional for recommendations on compatible clear coats for your specific paint type.
Applying Clear Coat and Allowing Proper Curing Time
Follow these steps to apply the clear coat to the golf driver head:
- Shake the clear coat can thoroughly to ensure proper mixing.
- Hold the can at the same distance as when applying the primer and base coat.
- Apply thin, even coats of clear coat to the entire surface of the head, including the painted areas.
- Allow each coat to dry according to the manufacturer’s instructions, typically 24 hours between coats.
- Apply multiple coats of clear coat to achieve the desired level of protection and glossiness.
Ensure that you’re working in a well-ventilated area when applying the clear coat. Take care to avoid dust or debris settling on the wet clear coat, as it can affect the final finish. Allow sufficient drying and curing time before handling or reinstalling the driver head.
Finishing Touches and Final Inspection
After the clear coat has dried and cured, it’s time to add the finishing touches to your painted driver head. Follow these steps for a final inspection and any necessary touch-ups:
- Inspect the Paint Job for Any Imperfections or Blemishes: Carefully examine the driver head for any areas where the paint may have smudged, dripped, or is uneven. Note any imperfections that require touch-ups.
- Making Necessary Touch-Ups and Corrections: Use fine brushes or paint pens to touch up any imperfections. Apply small amounts of matching paint and blend it seamlessly with the surrounding areas. Take your time and be meticulous during this step to achieve a flawless finish.
- Ensuring Proper Drying and Curing of the Painted Golf Driver Head: Allow the touch-up paint to dry thoroughly before handling the driver head. Follow the manufacturer’s instructions for recommended drying and curing times to ensure the paint sets properly.
By taking the time to perform a thorough inspection and making necessary touch-ups, you can ensure that your painted golf driver head looks professional and polished.
Caring for a Painted Golf Driver Head
To maintain the appearance and longevity of your painted driver head, proper care is essential. Here are some best practices for cleaning and maintaining your painted golf driver head:
- Regular Cleaning: After each round of golf, gently wipe down the driver head with a soft, damp cloth to remove any dirt or debris. Avoid using harsh chemicals or abrasive materials that may damage the paint. Dry the driver head thoroughly before storing it.
- Avoid Excessive Impact: While golf driver heads are designed to withstand the impact of the golf ball, excessive impacts, such as hitting the ground or other hard surfaces, can chip or scratch the paint. Take care when handling and using your driver to prevent unnecessary damage.
- Store Properly: When not in use, store your driver head in a protective headcover to prevent accidental damage. Ensure the headcover is clean and free from debris that could scratch the paint. Store the driver head in a cool, dry place to avoid exposure to extreme temperatures or moisture.
- Periodic Inspection: Regularly inspect the painted surface of your driver head for any signs of wear, chipping, or fading. If you notice any damage, address it promptly by applying touch-up paint to prevent further deterioration.
- Professional Restoration: Over time, the painted surface of your driver head may require professional restoration to maintain its original appearance. If the paint has faded or suffered significant damage, consider seeking the services of a professional club restoration specialist who can refinish the head to its original condition.
By following these care guidelines, you can ensure that your painted golf driver head remains vibrant, protected, and visually appealing for many rounds to come.
Exploring Alternative Options: Professional Painting Services or Golf Driver Head Covers
While painting your golf driver head can be a fun and rewarding DIY project, there are alternative options to consider. Here are two alternatives:
- Professional Painting Services: If you’re seeking a high-quality, professional finish or if you have intricate design ideas that may be challenging to execute yourself, consider engaging the services of a professional club painting company. They have the expertise, specialized equipment, and experience to deliver exceptional results.
- Golf Driver Head Covers: If you prefer not to paint your driver head or want a temporary customization option, golf driver head covers offer a practical solution. There are various head covers available in different colors, designs, and materials that allow you to personalize your driver without the need for painting.
Consider your preferences, skill level, and desired outcome when deciding whether to paint your golf driver head yourself or explore alternative options.
Conclusion
Painting a golf driver head is an excellent way to personalize your equipment and provide an additional layer of protection. By following the step-by-step process outlined in this guide, you can transform your driver head into a unique work of art. Remember to gather the necessary materials, properly prepare the surface, apply primer, base coat, and clear coat, and give attention to detail during each stage. With proper care and maintenance, your painted driver head will showcase your style and individuality while enhancing your confidence on the golf course. Enjoy the process and unleash your creativity to make your golf driver head stand out from the crowd.