How To Remove Golf Spikes
Golf spikes are a crucial component of a golfer’s equipment, providing traction and stability during swings and walks on the course. However, over time, these spikes can wear down or become damaged, diminishing their effectiveness and potentially affecting your game. Knowing how to remove and replace golf spikes is an essential skill for any golfer seeking to maintain peak performance.
In this comprehensive guide, we will walk you through the step-by-step process of removing golf spikes, ensuring you can replace them with ease and precision. Whether you’re a seasoned golfer or a beginner, understanding this fundamental aspect of golf equipment maintenance will not only prolong the lifespan of your spikes but also optimize your grip and stability during your swing.
Throughout this guide, we will discuss the necessary tools, explain various spike systems, and provide detailed instructions on how to remove golf spikes from different types of golf shoes. We will also address common challenges you may encounter and offer expert tips to make the process smooth and hassle-free.
By mastering the art of removing golf spikes, you will be able to maintain the quality of your golf shoes, enhance your overall performance on the course, and ensure that you remain comfortable and confident throughout your rounds. So, let’s dive into the world of golf spike removal and take your golfing experience to new heights!

Understanding Golf Spikes
Before we dive into the removal process, let’s take a closer look at golf spikes and their importance. Golf spikes are protrusions on the sole of your golf shoes that provide traction and stability during your swing. They come in different types, each with its own attributes and advantages.
Types of Golf Spikes
- Traditional Metal Spikes: These are made of metal, typically steel, and are known for their durability and exceptional traction. They have been used in golf shoes for many years and offer excellent stability, especially in wet or hilly conditions. However, they can be more abrasive to the greens and clubhouse floors compared to other types.
- Soft Spikes: Soft spikes, also known as plastic spikes, have gained popularity in recent years due to their versatility and course-friendly nature. They are made of durable rubber or plastic materials and provide adequate traction while being less damaging to the course. Soft spikes are also more comfortable to walk in and easier to replace.
Understanding the different types of golf spikes allows you to choose the ones that best suit your playing style and course conditions. Now, let’s move on to the process of removing golf spikes.
Preparing for Golf Spike Removal
Before you begin removing golf spikes, it’s important to gather the necessary tools and ensure a suitable workspace.
Tools and Equipment Needed
To successfully remove golf spikes, you will need the following:
| Tool | Description |
|---|---|
| Golf spike removal tool | A specialized tool designed to loosen and remove spikes |
| Replacement golf spikes | New spikes that match the type and size of your shoes |
| Soft cloth or towel | For cleaning and wiping the golf shoes during the process |
| Golf shoe cleaning brush | To remove dirt and debris from the shoe soles |
Creating a Suitable Workspace
Find a well-lit and spacious area to work on your golf shoes. It’s recommended to have a clean, flat surface where you can comfortably handle the shoes and perform the spike removal process. Additionally, ensure that you have good ventilation to prevent any discomfort from fumes or odors that may arise during the process.
Now that you’re prepared, let’s proceed with removing the golf spikes.
Removing Golf Spikes
The process of removing golf spikes involves several steps to ensure a safe and effective removal. Follow these steps to remove the spikes from your golf shoes.
Step 1: Cleaning the Golf Shoes
Before removing the spikes, it’s important to clean the golf shoes to remove any dirt, debris, or grass clippings that may be covering the spike receptacles. This will make the spike removal process easier and prevent any damage to the shoe or spike removal tool.
Take a soft cloth or towel and wipe the shoe soles thoroughly. Pay close attention to the areas around the spikes, ensuring that they are clear of any obstructions. Use a golf shoe cleaning brush to remove any stubborn dirt or debris stuck in the crevices or between the spikes.
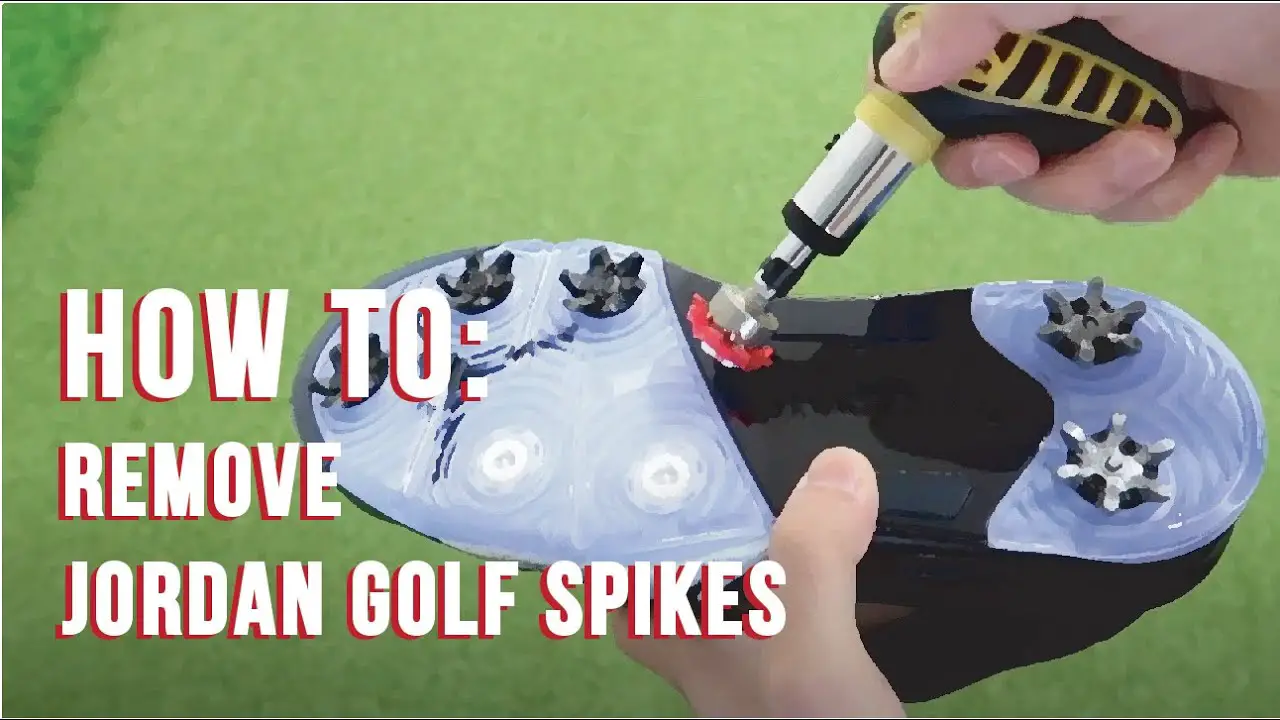
Step 2: Loosening the Old Spikes
Once the shoes are clean, it’s time to loosen the old spikes using a golf spike removal tool. The removal tool is specifically designed to fit into the spike receptacles and provide leverage to unscrew the spikes.
Insert the spike removal tool into the receptacle of the first spike you wish to remove. Hold the shoe securely and turn the removal tool counterclockwise to loosen the spike. Apply steady but gentle pressure, ensuring not to force it or damage the spike receptacle. Repeat this process for each spike on the shoe.
If you encounter any resistance while loosening the spikes, you can try spraying a small amount of penetrating oil onto the spikes to help loosen them. Allow the oil to penetrate for a few minutes before attempting to remove the spikes again.
Step 3: Removing the Old Spikes
Once the spikes are sufficiently loosened, carefully pull them out of the shoe using the spike removal tool. Make sure to hold the shoe securely to avoid any accidental damage during the process. Remove each spike one by one until all the old spikes have been taken out.
Inspect the spike receptacles after removing the old spikes. Look for any dirt, debris, or signs of damage. It’s essential to clean the receptacles thoroughly before installing the new spikes to ensure a secure fit and optimal performance.
Step 4: Inspecting the Spike Receptacles
Inspect the spike receptacles on the shoe soles for any debris, dirt, or wear. Use a soft cloth or a brush to clean out any dirt or debris that may have accumulated in the receptacles. If you notice any damage, such as cracks or loose receptacles, it’s recommended to consult a professional or contact the shoe manufacturer for repair or replacement options.
Ensuring that the spike receptacles are clean and in good condition will contribute to the proper installation and functionality of the new spikes.
Installing New Golf Spikes
Now that the old spikes have been removed and the spike receptacles are clean, it’s time to install the new golf spikes. Follow these steps to ensure a proper installation:
Step 1: Selecting the Appropriate Replacement Spikes
Choose replacement spikes that match the type and size required for your golf shoes. Refer to the shoe manufacturer’s guidelines or consult a golf professional for the correct spike specifications. Different shoe models may have specific spike requirements, so it’s important to ensure compatibility.
When selecting replacement spikes, consider factors such as the course conditions, personal preference, and the type of grip and traction you desire. Some spikes are designed for specific terrains, while others offer a more versatile performance. Make an informed decision based on your playing style and course conditions.
Step 2: Aligning the New Spikes
Carefully align the new spikes with the spike receptacles on the shoe sole. Ensure that the spikes fit snugly into the receptacles and are aligned correctly for optimal performance. Press down gently but firmly to insert the spikes into the receptacles.
It’s important to note that different spike models may have varying installation methods. Some spikes may require twisting or locking mechanisms, while others simply need to be pressed in. Follow the manufacturer’s instructions specific to the replacement spikes you have chosen to ensure proper installation.
Step 3: Tightening the New Spikes
Once the new spikes are inserted, use the golf spike removal tool or a spike wrench to tighten them securely. Turn the tool or wrench clockwise to tighten the spikes, ensuring that they are firmly in place. Be cautious not to overtighten, as it may cause damage to the spike or the shoe.
Check the tightness of each spike and make any necessary adjustments to achieve a consistent and secure fit. Properly tightened spikes will provide the necessary traction and stability during your golf swing.
Caring for Golf Spikes
To maintain the longevity and performance of your golf spikes, it’s important to implement regular cleaning and maintenance practices. Here are some tips to care for your golf spikes:
- Clean the spikes after each round of golf: Remove any dirt, grass clippings, or debris that may have accumulated on the spikes by using a golf shoe cleaning brush or a soft cloth. This will prevent dirt and debris from affecting the spike performance and ensure optimal traction.
- Inspect for wear or damage regularly: Routinely check the condition of your golf spikes. Look for signs of wear, such as flattened or worn-down spikes, as they may need to be replaced. Damaged or bent spikes should be replaced immediately to maintain proper grip and stability.
- Replace worn-out or damaged spikes promptly: When you notice significant wear or damage to your spikes, it’s time for a replacement. Continuing to use worn-out spikes can compromise your performance on the course and increase the risk of slips or falls. Keep a stock of replacement spikes on hand so that you can easily swap them out when needed.
- Proper storage of golf shoes: When you’re not using your golf shoes, store them in a cool, dry place. Avoid leaving them in damp or humid environments, as this can promote the growth of mold or mildew. Additionally, consider using shoe bags or individual compartments in your golf bag to protect the shoes and prevent damage to the spikes.
By implementing these care practices, you can prolong the lifespan of your golf spikes and ensure consistent traction and stability during your rounds of golf.
Conclusion
Regular maintenance and replacement of golf spikes are essential for optimal performance on the golf course. By following the step-by-step process of removing golf spikes and understanding the importance of proper care, you can keep your golf shoes in excellent condition.
Remember to clean your spikes after each round, inspect them regularly for wear or damage, and replace them as needed. With well-maintained spikes, you can enjoy improved traction, stability, and comfort during your golf swings.
Take the time to care for your golf spikes, and they will reward you with enhanced performance and confidence on the course. So, get ready to step onto the fairway with confidence, knowing that your golf shoes are equipped with reliable and well-maintained spikes.